Growing Guides
Growing Guide
Vegetable Plants
What to do first?
After unpacking, inspect your plants and water them if dry. Potted plants can be retained in their pots in a sheltered place for a while but check them regularly to ensure they do not dry out. Young plants will soon dry out, if these cannot be planted straight into the ground, they should be potted up or temporarily put into trays of compost with the roots fully covered and watered so that they do not dry out. Bareroot plants should be placed in a bucket of water for up to an hour (no longer) to moisten the root system thoroughly before planting. If not ready to plant, bareroot plants can be temporarily ‘heeled’ into a shallow trench on a spare patch of ground, covering the roots with moist soil.
Planting Out
Young Plants Mr Fothergills advice on how to plant out and grow on your young plants.
Hardening Off It is advisable to harden young plants off before planting them outside or into an unheated greenhouse. Gradually acclimatise plants to outside temperatures by placing them outdoors for a few hours a day and slowly extending the daily period outside over a week or two, depending on how low the temperatures are. Once they are outside permanently and planted out, keep some fleece handy just in case there are still any unusually chilly nights.
Growing in Containers If growing in containers the minimum size pot that is suitable is 30cm (12") and if using a grow bag, plant a maximum of two plants per bag for varieties such as aubergines, cucumbers, peppers and tomatoes.
Greenhouse Varieties Our tomato, cucumber, melon and pepper plants have been nurtured on the nursery for several months, so that you receive large, bushy 9cm (3.5") potted plants ready for immediate potting on or planting out. If the weather is still cold, it is best practice to harden plants off for a week or two before they are left in an unheated greenhouse permanently.
Grafted plants Plant them into pots, a greenhouse border or outside after it has been prepared by digging in lots of organic material. The grafted union must be kept above the soil level to ensure suckers and adventitious roots do not develop.
Outdoor Varieties Many of these plants are intolerant of frost, when the weather is warm they can be planted out immediately. Don't be tempted to rush planting out if the conditions are too cold and wet, plants will soon catch up if planted in better conditions and will eventually outperform those that struggled to get going in the cold. It is best to wait until soil temperatures warm up to 10-15°C (50-59°F). This can be helped along by covering the soil with black plastic sheeting or matting. Gradually acclimatise plants to outside temperatures by placing them outdoors for a few hours a day and slowly extending the time spent outside over a week or two, depending on how low the temperatures are. Once planted out, be prepared to provide fleece or cloche protection if there is the threat of an unusually late cold spell.
Soil should be well-drained and, ideally, use ground that was dug, manured, if necessary, in the previous autumn or early winter. Rake in some general-purpose fertiliser, such as Growmore, a few days before planting. When planting, make holes with a trowel and pour a little water into the bottom of the hole. After inserting the plants, firm them in well. After planting give them a thorough watering to settle them in. Unless stated otherwise, set each one so the top of the root-ball is just below the surface of the soil.
Further information by variety
A-Z LISTING:
ARTICHOKES Plant Jerusalem Artichoke tubers horizontally, 10-15cm (4-6") deep, 30cm (12") apart, allowing 30cm (12") between rows. In late summer cut off the flower heads, leaving the stems approx. 150cm (5') tall. Finally cut stems down down to 10cm (4') when the remaining leaves turn yellow. The tasty tubers can then be dug up and harvested when required. Globe Artichoke plants should be planted 90cm (3') apart. Keep well watered in summer, do not allow plants to dry out, provide a moisture retaining mulch if necessary. Established plants can be divided every few years by replanting any off-sets. Globe Artichoke plants generally become most productive in their second year. Cut the heads when the scales feel plump and firm but have not yet begun to open.
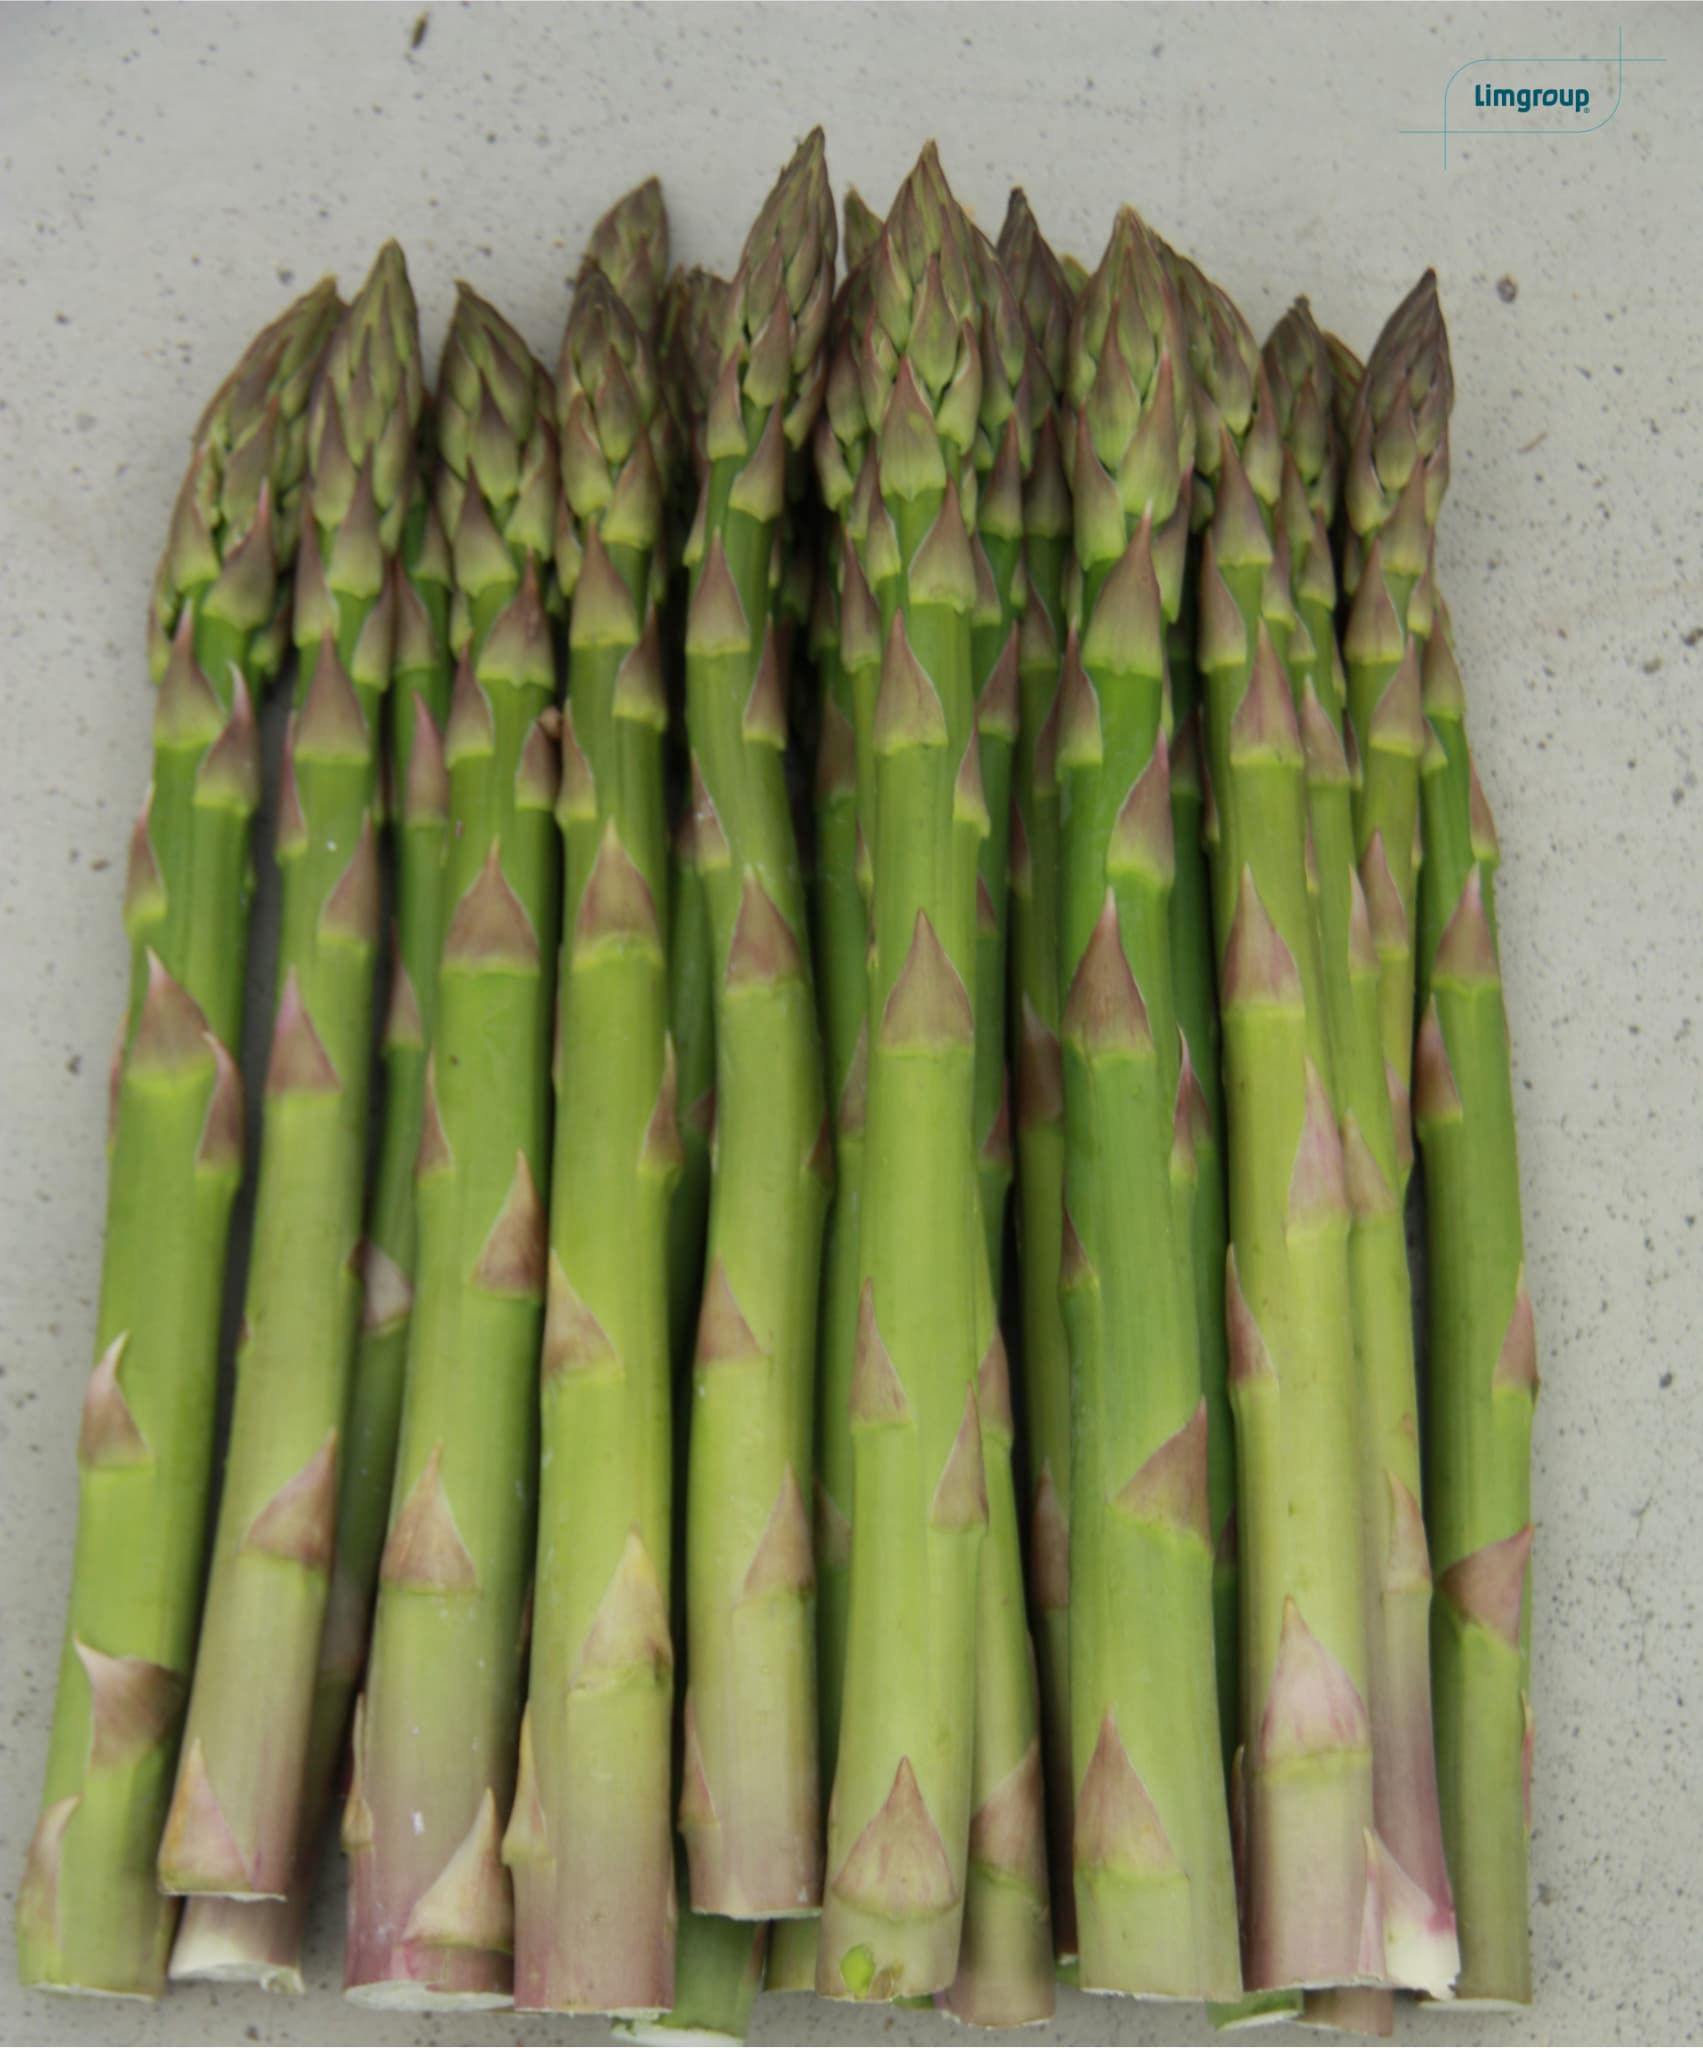
ASPARAGUS Trim off any broken or damaged roots, then soak the crowns for an hour or so in a bucket of water. Aim to plant out as soon as possible. If it is necessary to delay planting for any reason, crowns can be kept for a few days in a cool but frost-free place, such as a shed, if covered with damp material, such as newspaper or sacking. They must not be allowed to dry out.
Asparagus does best in an open and sunny site but where there is some shelter from strong winds. As it is a long-term crop, it pays to prepare the site well, ideally in the autumn before planting. A rich but well-drained soil is necessary for good results, so incorporate plenty of well-rotted organic matter, such as farmyard manure or garden compost. If the soil is heavy, dig in plenty of sharp sand or horticultural grit. Immediately before planting apply a dressing of a balanced compound fertiliser, such as Growmore.
To plant crowns, dig a trench about 20cm (8") deep and wide enough to take the roots when spread out flat. If you are planting more than one row, space the rows 90cm (3') apart. Now create a mound about 7cm (3") high down the middle of each trench. Set the crowns 40cm (16") apart on this mound, with their roots spread out down the sides, and then cover them with 5cm (2") of soil, firming them in as you go.
AUBERGINE These will arrive potted into 9cm (3.5") pots. Plants can be transplanted into containers 30cm (12") in diameter or into grow bags, indoors or outside in a sunny, sheltered spot (once night temperatures remain well above 10°C (50°F). Keep plants well watered, overly dry plants may begin to drop their leaves or fruit. To grow large aubergines, restrict production to 5 fruit per plant by removing any others that develop. Feed regularly during the growing season.
BEETROOT Set out plants 10cm (4") apart in rows 30cm (12") apart. Closer spacing can be used if growing in small spaces or containers, and roots are to be harvested when young. For earlier crops grow under cloches or tunnels. Harvest roots at any stage, colourful young beetroot leaves also make a great addition to salads. Take just a few leaves from each plant so they can happily grow on.
BRASSICAS (Brussels Sprouts/Cabbages/Kale etc.) Be sure to plant seedlings firmly, especially in open, exposed or windy locations. This will help to prevent wind rocking the plants and damaging the delicate roots which can hinder growth. In areas where cabbage root fly is prevalent it is advisable to at protect them in some way, such as by covering with fleece or Enviromesh or by placing ‘collars’ around the bases of the stems. Protect from butterflies (and their caterpillars) with Enviromesh or netting through the summer months. Ensure the netting is held well above the plants for it to be effective in preventing the butterflies laying eggs on the leaves.
BROAD BEANS Set out plug plants 23cm (9") apart and in rows 45-60cm (18-24") apart. Young plants will benefit from cloche protection during cold weather. Taller varieties are best supported by string or wire strung between canes set along the row. Bean plants should not be allowed to dry out and always benefit from extra watering when they are flowering. Pinch out the main growing tip of the plants when the first pods begin to set, this will help to encourage an early crop and helps deter blackfly. Begin harvesting pods from the bottom of the plant upwards.
BRUSSELS SPROUTS see Brassicas.
CABBAGE see Brassicas.
CELERIAC Plant seedlings 25cm (10") apart in rows 30cm (12") apart, taking care not to bury the crown (the upper part of the swelling root) and water well. For best results, provide a mulch to retain moisture in the soil and remove the outermost leaves to encourage the roots to swell. Celeriac likes a long growing season up to 6 months. Harvest them when 7-13cm (3-5") in diameter, as and when required. Roots can be left in the ground right into the winter, they also keep best this way.
CELERY Plant at the base of a 30cm (12") deep trench, 23cm (9") apart. Soil is then easily drawn up around the stems (earthed up) as plants grow to blanch the stems, keeping leaves above the soil. Remove any extra side-shoots which may appear. Do not allow plants to dry out, keep them well watered, especially during dry spells. Plants can be grown and harvested through the winter if protected with a cloche or layer of straw.
COURGETTE/SQUASH/PUMPKIN These will arrive potted into 9cm (3.5") pots. Set out plants 60-90cm (24-36") apart in rows 90-120cm (36-48") apart. Plants will grow on best if the soil temperature is around 15°C (59°F) or above. While young plants are hardened off, the soil can be warmed by laying down black plastic or matting. Early plantings will benefit further from cloche protection of the nights are still chilly.
CUCUMBERS These will arrive potted into 9cm (3.5") pots. Set out plants 30cm (12") apart in rows 45cm (18") apart. Alternatively, plant out into large containers, greenhouse borders or grow bags. Regular watering is essential after planting, during flowering and fruit production. Pinch out the main growing tip after the first 6 leaves have appeared to create a bushier plant and train the resulting new shoots up canes, strings or netting. To focus the plants' energy on cucumber production, pinch out the side growth at two leaves past each developing fruit, and remove the main growing tip again when plants reach the top of their support.
DWARF (FRENCH) BEANS like light well drained soil, so heavy soils are best improved before planting with the addition of grit, sand and well rotted manure or compost to open up the structure. Set out plants 30cm (12") apart, in rows 45cm (18") apart. Dwarf bean plant yields benefit greatly from increased watering when they are in flower, and should not be allowed to dry out. Pick beans regularly to encourage further cropping.
GARLIC see Onion & Shallot Sets and Garlic Bulbs.
HERBS These will arrive potted into 9cm (3.5") pots. Grow on in a sheltered position, whether you plan to plant in beds, borders or larger containers. Trim regularly and remove any flowering shoots, to ensure fresh new leafy growth. Many herbs can also be grown in containers and brought indoors to continue cropping into the winter months.
HORSERADISH Grows best in a deep, well-drained soil which has had plenty of well-rotted farmyard manure or garden compost added to it. Plant the thongs as soon as possible after receipt. IMPORTANT: Plant the thongs with the sloping cut at the base and the flat one at the top, at about 5cm (2") below the soils surface. Allow 60cm (2') between thongs.
After planting top-dress with a general-purpose fertiliser, water in well and keep watered until established. Do not allow to dry out during summer months. For best results feed with a liquid feed with seaweed fertiliser during summer.
KALE see Brassicas.
LEEKS Set out plants 15cm (6") apart, in rows 30cm (12") apart. Make sure the soil is well dug over before planting, as leeks grow best in soil which is not compacted. At each planting site make a 15cm (6") deep hole with a dibber and drop a seedling in. Then fill the hole with water to settle some soil around the roots. Do not fill the hole with soil, the leeks stems (shanks) will quickly fill out. Water plants well as they get established, after that water only during prolonged dry spells. For blanched white stems, carefully pull soil up around the plants (earth-up) as they grow. When ready, Leeks will stand in the ground for several months and only need to be harvested as required.
LETTUCE AND ORIENTAL VEGETABLES Set out plants 23cm (9") apart in rows 30cm (12") in sun or part shade. Non-hearting varieties can generally be planted closer together and harvested as cut and come again crops, taking a few leaves from each plant so they can grow on for continued harvesting.
MELON Grow under cover where possible, in moist, well drained, fertile soil. Plant into greenhouse borders, large containers or grow bags. Outdoor crops will be smaller and later to mature and not recommended for colder areas. Set out plants 90cm (3') apart. Pinch out growing tips after 5-6 leaves have formed. Watering should be regular and consistent for best results. Provide a liquid feed weekly, once fruits begin to form.
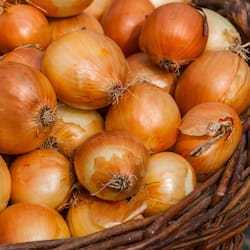
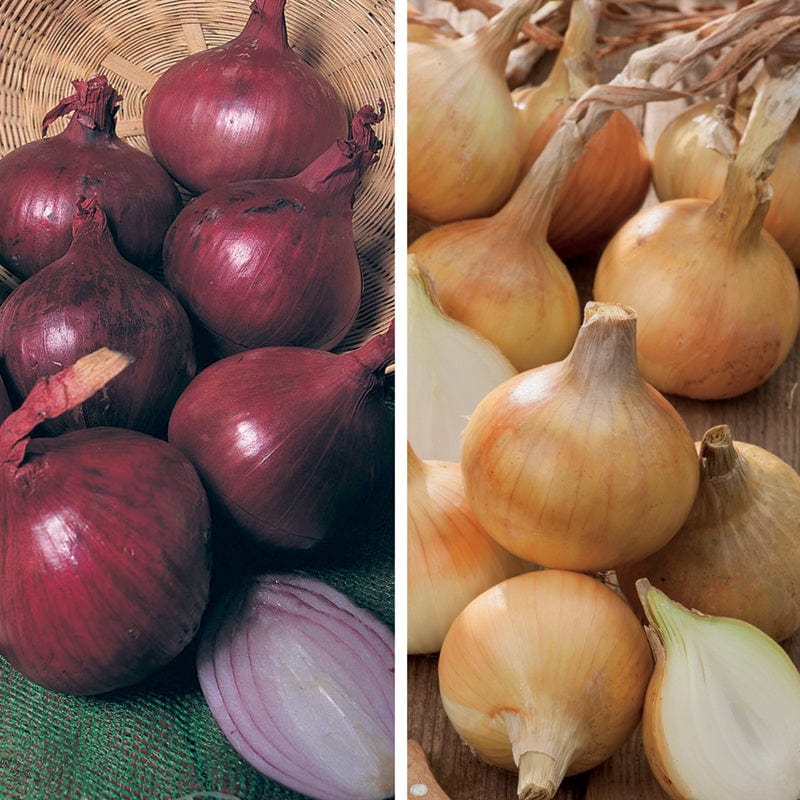
ONION & SHALLOT SETS AND GARLIC BULBS After unpacking if you are not ready to plant immediately, store them in a cool, light, well-ventilated and frost-free place, away from direct sunlight. Winter hardy varieties can be planted in September through to December, otherwise plant between February and April, as soon as the soil is sufficiently dry and warm; in practice this is usually late winter or early spring for light, quick draining sandy soils and mid-spring for heavy, water-retaining clay-based soils.
Onions, shallots and garlic have a low nitrogen requirement, so the soil does not need to be heavily fertilised before planting, but will benefit from digging in well rotted manure in the autumn to kick start growth in the spring. Heat-treated sets (which have had their flowering potential suppressed and so are bolt resistant) don't need to be planted before late March or April.
Onion and shallot sets are best placed into a shallow drill (groove) in the soil and covered or, if the soil is light and loose, can be pushed gently into the surface. The pointed tips of the bulbs should sit just about at soil level. Spacing can be anything from 2.5-10cm (1"-4") apart, depending on the size of bulbs planted, the space available and the size of the bulbs required at harvest.
Garlic bulbs can be given the same treatment, but they require deeper planting. Split your bulbs into cloves and plant each clove 2.5cm (1") below the soil surface and generally around 10cm (4") apart. Elephant garlic needs increased spacing to 30cm (12") apart. Keep free of weeds during the growing season. Mulch in spring to suppress weeds and water if necessary.As soon as the leaves turn yellow you can begin to harvest; lift carefully and leave to dry in the sun if the weather is warm or indoors if the weather is wet. Handle gently as they are easily bruised, which will reduce their longer term storage potential.
ONION PLANTS Set out plants approximately 10cm (4") apart in rows 25cm (10") apart. Plants grown for exhibition purposes (such as Kelsae, Exhibition, Fasto F1 and Tough Ball F1) should be planted 40cm (16") apart in rows 50cm (20") apart. Plant the base of the bulb about 13-20mm (½-¾") deep and firm well. Water plants in.
Onions are most demanding of fertility, so make sure the ground is well prepared with plenty of rotted manure/compost. Before planting rake in a top-dressing of a general fertiliser, such as Growmore. Keep plants well-watered when the weather is dry but stop watering when the bulbs become swollen.
Harvest when foliage begins to turn yellow and die back in August.
PEAS Set out plants 10cm (4") apart in rows 45cm (18") apart. Protect young plants from birds with twigs, netting or bird scarers. Most peas will require support to grow up, such as chicken wire or netting strung between canes. Twiggy 'pea sticks' pushed into the ground are a traditional option. Ensure you water regularly, especially in dry spells and during the flowering period. Retain moisture by mulching around the base of the plant. If you’ve dug plenty of organic matter into your soil at the start of the season, there should be more than enough nutrients for your crop. Otherwise, for maximum crops, feed your plants regularly with a liquid fertiliser. Snap peas and mangetout pods should be harvested as soon as they are large enough and before the peas inside begin to swell. Pick from the bottom of the plant upwards and harvest regularly to encourage further cropping.
PEPPERS/CHILLIES These will arrive potted into 9cm (3.5") pots. Under glass, they can be planted directly, 40cm (16") apart, into a greenhouse border. but most people prefer to use growbags, each of which will take two or three plants. To grow in pots transfer to 30cm (12") pots a few weeks after receipt. Once flowers have formed, feed plants regularly with a liquid fertiliser such as tomato food. Gently shake plants and spray flowers with tepid water to help pollinate the flowers and encourage fruit to set. Grow outdoor crops in a sheltered sunny location, outdoor crops will be smaller and later than those grown indoors.
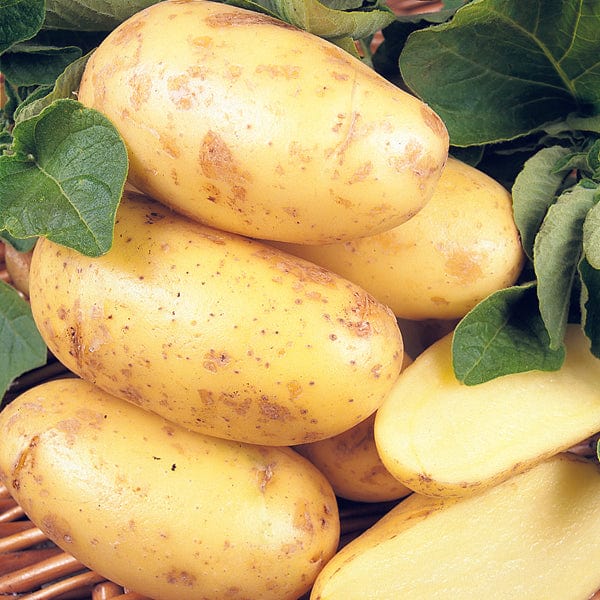
POTATOES After unpacking, store your tubers in a cool, light, well-ventilated and frost-free place, away from direct sunlight. Potatoes can be divided into five categories, planted from March to early August,
1. First Earlies – Ready June to July (earlier in some sheltered areas)
2. Second Earlies – Ready July to August
3. Early Maincrops – Ready August onwards
4. Late Maincrop – Ready September onwards
5. Second Cropping / Late Cropping – Ready September to December
All seed potatoes, particularly earlies and second earlies, benefit from chitting (pre- sprouting) over several weeks before planting. Place them out, with the end containing the most 'eyes' uppermost, in single layers in seed trays or in egg boxes. Place in a light, cool, well-ventilated place to encourage the development of shoots 2-2.5cm (¾-1") long.
Later cropping potatoes are less likely to need chitting as warmer soil temperatures can make a greater difference.
Please note; a few of our varieties start to chit (shoot) quite early in the season when you receive them, please rest assured this is totally fine. Some years this happens more than others, especially if there have been warm temperatures at both harvest time and in the autumn/early winter. Several varieties are also notorious for early sprouting, so despite our best efforts and that of our growers, they are off to a very quick start. These shoots are easily knocked off when handled, and in fact the tubers will benefit when that early shoot is knocked off, so please do so once you receive them if they are large because it encourages all the eyes to open, many strong chits to form and makes for a better crop when planted.
SOIL PREPARATION AND PLANTING - Potatoes thrive in deep, fertile, well drained soils. Soil conditions prior to planting are more important than precise planting times. Prepare the soil well before planting, breaking down any clumps and adding fertiliser or manure. Planting too early in cold, wet soils may cause rotting. We recommend you delay planting until the soil is both warm and moist to touch. In most areas this is in the late March to May period.
Plant individual seed potatoes with a trowel or dig a 12-15cm (5-6") deep trench and set at the recommended spacings below and cover. Protect the emerging shoots from later frosts by earthing up (carefully drawing soil over the shoot tips). Regular earthing up during the season will also encourage larger yields and prevent tubers from turning green.
SECOND CROPPING/LATE CROPPING VARIETIES - Potatoes are not frost hardy and quite susceptible to cold, so as the weather turns colder (October), start to protect plants at night and on colder days with fleece. Plants should still be left uncovered on milder days. Straw placed around plants in November will give additional protection in any severe weather. Even when mature, late cropping potatoes keep best if left protected in the soil and should just be dug as needed, right up to Christmas and even into the New Year.
PLANTING IN CONTAINERS (POTATO KITS) - Plant 5 tubers per planter – our patio planters have a 40litre capacity. For smaller containers simply plant less tubers. Plant approximately halfway down in the planter and cover, when the shoots reach 15cm (6") tall, add another 10cm (4") layer of compost on the top. This prevents light from reaching the tubers and stops them turning green. Repeat the process of earthing up as the stems lengthen - just leave some leaves showing to absorb sunlight and grow. Place the container in a bright, frost-free, sheltered position and keep well-watered. Because potatoes are heavy feeders supply a good quality plant food throughout the season.
POTATO BLIGHT MANAGEMENT - Blight rapidly develops from droplets carried on the wind to form a brown or black circular patch called a lesion. The lesions have a soft, wet appearance and if formed on leaves will show white fungal threads on the underside. Once more than a third of the foliage is infected it is best to remove all foliage off site because the tubers will have stopped growing anyway. This is why first and second earlies are popular, because they largely avoid blight if they harvested early enough. Sarpo varieties have become increasingly popular in recent years as well as a number of new varieties which have been bred and developed for their unique blight resistance.
PUMPKIN see COURGETTE/SQUASH/PUMPKIN.
RUNNER/CLIMBING BEANS When choosing a position for these beans make sure the shade they cast will not be detrimental to other plants. To support these climbing plants, it is usual to erect a double row of 2.5m (8') canes, tied at the top to create a long 'A' frame. Wigwams of canes or nets supported by upright poles can also be used. In a double row, the two rows should be 45cm (18") apart and the canes should be 30cm (12") apart. Set out one plant at the base of each cane. Water well until plants are established. Once plants reach the top of their support structures, pinch out the growing tip. This will stop them growing taller and focus their energy into producing more pods. Adding a liquid feed once every fourteen days will help increase your crop. Depending on the variety, pods are good to harvest when they’re about 15cm (6") in length. Pick every couple of days to avoid a glut, and to prevent your beans from becoming stringy.
SHALLOTS see Onion & Shallot Sets and Garlic Bulbs.
SQUASH see COURGETTE/SQUASH/PUMPKIN
SWEDE Plant in rich, well-dug soil allowing 25cm (10") between each plant and between each row. Keep the rows weed free and plants well-watered until they are established. Roots are hardy and may be left in the ground until required. Alternatively, if the ground is required for the next crop, they can be lifted and stored in a cool dark, dry place. Swede roots also freeze well, for long term storage.
SWEET CORN Set out plants approx. 40cm (16") apart, disturbing the roots as little as possible. Plant in out in a block formation, this will help with wind pollination, ensuring pollen is easily shared among the plants, and the cobs will be well filled with juicy kernels. 'Sugar-enhanced' sweet corn varieties should be grown well apart from 'Supersweet' varieties, as wind cross-pollination can impair their flavour. Take care when weeding around the plants not to hoe too deeply and risk damaging the shallow roots. Watering is only needed when young plants are first getting established and again when the cobs are swelling. Plants usually produce one or two cobs each. Harvest sweet corn when the 'silks' on top of the cobs start to turn brown and eat as soon as possible after picking, for the sweetest flavour.
SWEET POTATOES On receipt, pot up plants in 9cm (3.5") pots and allow to grow on for a few weeks. Plant outside in June if weather and temperatures allow. Your Sweet Potatoes will require hardening off prior to planting outside. Sweet potatoes prefer warm and humid conditions of around 25°C (77°F). They can be grown outside in milder areas, but best results are usually achieved by growing them under cover, in polytunnels or in a greenhouse. Grow on ridged beds in a well-drained, rich soil, avoiding an area that has had legumes growing in during the previous year. Higher yields will be produced in warm summers. Space plants 25-30cm (10-12") with 75cm (30") between rows. Planting out too early in cold, wet soil will cause rotting. Plants can also be grown in large containers or grow bags. Harvest in autumn (October) when the leaves turn yellow and die back.
TOMATOES These will arrive potted into 9cm (3.5") pots. Under glass, they can be planted directly, 45cm (18") apart, into a border or into growbags, each of which will take two or three plants. To grow in containers, transfer to 30cm (12") pots a few weeks after receipt using a multi-purpose compost, and add a cane, up to 1.8m (6') in height to each pot, so the central stem of each plant can be supported and tied against it. Ensure plants are properly hardened off and well protected from any late frost if planted straight outside.
All varieties that are classed as indeterminate (cordon/vining) will need support and pinch out the small side shoots as they appear. Once the main stem reaches 1.8m (6'), or the top of its support, pinch out the growing tip. Removing the side shoots and growing tip will concentrate the plants' energy on fruit production. Determinate (bush) type varieties require less maintenance as they don't need side shoots pinching out and naturally maintain a more compact size. Water and feed regularly with a balanced tomato fertiliser and harvest the fruits as they ripen.

Growing Guide
Fruit Plants
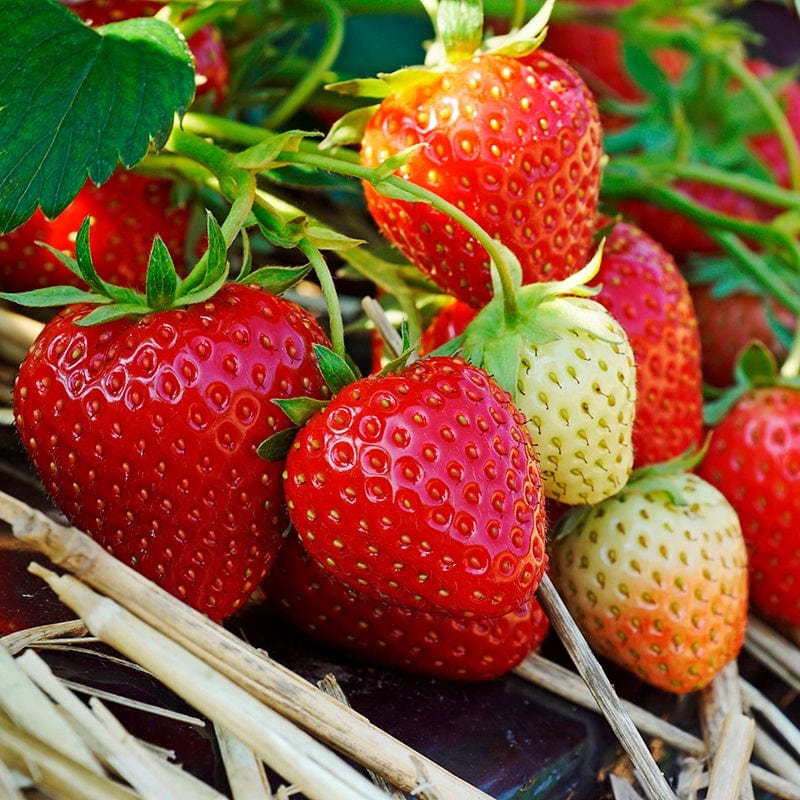
What to do first?
After unpacking, inspect your plants and water them if dry. Bareroot plants should be placed in a bucket of water for up to an hour (no longer) to moisten the root system thoroughly before planting.
Plant as soon as possible but, if ground is not ready or is too wet or frosty, delay planting until conditions are more suitable. Potted plants can be retained in their pots in a sheltered place for a while but check them regularly to ensure they do not dry out. Bareroot plants can be temporarily ‘heeled’ into a shallow trench on a spare patch of ground, covering the roots with moist soil.
Planting Out
SOIL PREPARATION AND PLANTING
Choose a sheltered area of the garden, avoiding exposed sites or frost pockets. Although soft fruit do best in full sun, they should also fruit reasonably well in partial shade.
All fruit will require a well-drained, rich, moisture-retentive soil to thrive, so dig over thoroughly and incorporate plenty of well-rotted organic matter like farmyard manure into the soil at the bottom. Generous manuring is particularly important for blackcurrants. Be sure to remove all perennial weeds as you dig and, just before planting, rake in a dressing of balanced fertiliser to give the plants a boost whilst they establish.
For raspberries a slightly acid soil suits them best and on heavy soil they will do better if planted on a raised bed or ridge.
ERICACEOUS VARIETIES: BLUEBERRIES,
CRANBERRIES AND LINGONBERRIES
Most importantly these are lime-haters and require a strongly acid soil to thrive. The ground should also be free draining but moisture retentive. Soils overlying chalk or limestone, or which contain free lime will not grow these fruits and, if you have such a soil, they should be grown in containers.
AFTERCARE TIPS
Your bushes will benefit from an annual mulch of organic matter, like well-rotted manure or good quality garden compost, to suppress weeds and conserve soil moisture. Spread it thickly every spring on the surface of the ground while the soil is still moist from winter rain. Each year at the same time, top-dress the plants with some balanced compound fertiliser and a high potash fertiliser to encourage flowering and fruiting.
Since many soft fruits are attacked by birds, particularly when grown on allotments, take this opportunity to provide supports for bird-proof netting. A permanent fruit cage, though initially expensive, is the easiest to manage.
Further information by variety
A-Z LISTING:
ARONIA (CHOKEBERRY)
Chokeberry is an easy to grow shrub, for sun or part shade, and plants can tolerate a wide range of soils, even boggy, as they are naturally found in wet swamps. Plants are also resistant to drought, most pests and diseases and pollution.
For best fruit production plant in a sunny spot at approximately 1-1.5m (3-4') apart. In the spring and autumn apply a layer of compost, rotted manure or other fertiliser around the base of the plants.
BLACKBERRIES, BOYSENBERRIES, LOGANBERRIES, TAYBERRIES,
TUMMELBERRIES AND JAPANESE WINEBERRIES
All these berries can be grown very effectively against a wall or fence otherwise support on a system of posts and wires about 1.8m (6') in height. Strain four wires horizontally between the posts at 30cm (12") intervals.
Plant 2.4-3m (8-10') apart, with the top of the rootball slightly below soil level. Finish by cutting the stem growth back to approx. 30cm (12") above soil level.
PRUNING
Floricane varieties produce fruit on wood which grew last season. In the first season after planting new canes will be produced from the plant base and these should be tied into your support (these are fruiting canes for next year). Meanwhile, new vigorous young canes (which will produce fruit in the third year) will grow from the plant base. Train these straight up the wires, vertically, in the centre of the bush. The finished effect at cropping time should be of a central growth of erect, young replacement stems tied into the wire with older fruiting stems on either side.
When the older canes have finished fruiting, cut them out and replace them with the young vigorous stems until now bunched together in the centre.
Primocane varieties fruit on current season’s growth and are all pruned in the same way, cutting the old canes back to soil level each year. However, since these fruit on the current season’s wood, prune the canes in February. The strong growth made during spring and summer will carry fruit in the autumn of the same year.
BLACKCURRANTS AND JOSTABERRIES
Fruit best on one-year-old wood and the aim of pruning is to ensure that the oldest wood is continuously replaced with vigorous new growths.
At the end of the first growing season the only pruning needed is to cut out to the base any very thin or weak shoots less than 30cm (12") long. In later years, pruning consists of removing any straggly and broken branches and between one quarter and one third of the oldest growth, depending on how much new wood there is. New wood is easily distinguished by its lighter colour and pruning can either be carried out after fruiting or in the autumn.
BLUEBERRIES, CRANBERRIES AND LINGONBERRIES
These plants require an acid soil in a sunny or semi shaded position. In the many areas where the soil is insufficiently acid they are easily grown in containers. Select containers of a size that will allow plenty of room for growth and pot plants individually using an ericaceous compost. In subsequent years re-pot in late autumn or early spring, as necessary. They must never be allowed to run short of water (rainwater preferably).
Plant the bushes 1.5m (5') apart for Blueberries, 30cm (12") apart for Cranberries and 45cm (18") for Lingonberries. Refill the hole and firm in, setting each plant with the top of the root-ball at about or slightly below soil level.
These berries will also benefit from annual mulch. Do this every spring while the soil is still moist from winter rain. Each year in March or April apply a lime-free fertiliser at the manufacturers recommended rates. In the case of blueberries an additional 17g m2 (½ oz yd2) of sulphate of ammonia can be applied if growth is not very strong and new shoots grow to less than 30cm (12") in a full season.
When plants are in full growth, feed regularly with an ericaceous liquid feed.
Birds love the fruit too, especially blueberries so ensure plants are protected with netting.
CURRANTS, GOOSEBERRIES AND JOSTABERRIES
All varieties can be planted in rows 1.5-1.8m (5-6') apart, with plants 1.5m (5') apart in the rows. Ensure plants are firmed in well after planting and kept well-watered, especially in their first season to aid their establishment.
Each year in March, at the same time as you mulch, top-dress the plants with some balanced fertiliser and a high potash fertiliser to encourage flowering and fruiting. Blackcurrants also benefit from a high nitrogen feed at this time.
In dry weather, especially on light soils, give bushes a generous watering about every two weeks.
GOOSEBERRIES, REDCURRANTS AND WHITECURRANTS
Fruit mostly on old wood and pruning aims to control the shape of the bush, keep the centre open and increase the number of fruiting branches.
After planting and each winter thereafter, cut back all main shoots by about half and lateral shoots to about 2 or 3 buds. At the same time remove any broken, very weak or crossing shoots, any suckers that might have developed from the ‘leg’ and any branches crowding the centre. Make each cut to an outward-facing bud, unless you are pruning a gooseberry that has a rather drooping habit, in which case cut to an upward pointing bud.
The formation of fruit buds will be encouraged if you also summer prune lateral shoots to 5 leaves at the end of June.
HONEYBERRIES
The Honeyberry is a species of Honeysuckle that produces sweet, tasty fruit. The fruit is similar to a blueberry and is produced early in the season; at least two weeks before strawberries. Exceptionally hardy with an eventual height and spread of 90cm (3').
Honeyberries are not self-fertile and you will need two plants; each a different variety; for pollination and fruit production. Your two bushes are different varieties. Please note the fruit produced in the first few years after planting can be quite small and sour. Having said this fruit produced after the plants are three to four years old will be larger and sweeter.
Plant in any well-drained soil but avoid areas where water lays on the ground after a hard rainfall; they do not tolerate being in very wet soil. For best fruit production plant in a sunny spot at approximately 1-1.5m (4-5 ft). apart, setting the root ball just below the surface of the soil.
In the spring and autumn apply a layer of compost, rotted manure or other fertiliser around the base of the plants.
KIWIS AND KIWIBERRIES
Kiwi fruits are vigorous climbers and can easily reach a great height, although they are best trained on horizontal wires on a warm wall and pruned to keep in check.
When planting, choose the site carefully ensuring you give the plant enough space to develop, as once established, plants are difficult to move. Plant against a fence or up against support wires. For more than one plant, plant 2-3m (6-10') apart. Kiwis prefer an acidic, well-drained soil. Choose a sunny position that is sheltered from strong winds.
Apply mulch of organic material, composted bark or compost around the base after planting, avoiding direct contact with the vine to prevent crown rot.
During the first summer ensure the plant does not dry out particularly in windy conditions, check the plants on a regular basis to ensure that the shoots are tied in and feed with a nitrogen feed regularly. Mulch generously in spring, again avoiding direct contact with the vine.
Prune in winter for best fruit production. During the first few years trim occasionally as required. After 3-4 years, the plant should be pruned annually to 8-12 shoots and thin out weak stems. Fruit is borne on 2-3-year-old stems.
The fruits will drop off or pull off easily when they are ripe. You can also harvest when fruits are mature and ripen them off the vine.
RHUBARB
Rhubarb will grow in almost any soil, in full sun or partial shade provided it does not become waterlogged in winter, but best results will be obtained on fertile soils, so dig in plenty of well-rotted organic matter, like farmyard manure or garden compost. Just before planting, rake in a dressing of balanced fertiliser, such as growmore, to help plants establish.
Set plants 90cm (3') apart each way and with the growing point 2.5cm (1") below the soil surface. After refilling with moist soil, firm in each plant.
Rhubarb can also be grown in a large pot or container, splitting and repotting after several years. You will need to ensure the plants are kept well-watered and feed more often than if grown in the garden.
Remove any flowering stems that may appear. Do not pull any sticks in the first season and pull only lightly in the second year to allow plants to establish and build up strong crowns.
Rhubarb is a heavy feeder so apply a balanced fertiliser at the end of the harvesting period and mulch generously with rotted manure or compost each winter.
For an early spring crop, strong plants are easily forced by covering them in January with suitable containers, such as buckets, bins or large pots. Cover these, in turn, with a thick layer of straw. Forcing has a weakening effect on crowns so do not force the same plants again for at least two years.
N.B Rhubarb leaves are poisonous and must be removed completely from the
stalks before they are cooked.
STRAWBERRIES
Soil preparation and planting
Strawberry beds have a limited life and need to be replaced every 3-5 years with virus-free stock. As they should each time be replanted on a fresh site where they have not been grown for several years, they are best grown as a rotational crop with vegetables rather than being included in a more permanent fruit area. Choose a sheltered area of the garden in full sun and, if possible, avoid known frost pockets.
Bare-root plants arrive with lots of long roots and with short and stumpy leaves above the crown. They may appear unhealthy, but don’t worry – these plants will soon spring into life and bear lovely fruits! Set plants 40cm (16") apart, in rows 1m (40") apart. Plant with a trowel, ensuring the roots are well spread out in each planting hole. It is most important to set the crowns just level with the soil surface. After refilling with moist soil, firm in each plant and water well.
AFTERCARE TIPS
If your plants are not growing strongly, particularly if they are spring planted, it is best to de-blossom them in their first season. This may seem hard in the short term but will enable plants to devote all their energies to building strong crowns for future years.
During May and June, strawberry mats or straw, can be gently placed around the plants and under the fruiting trusses. This keeps the fruits clean and reduces rotting.
Ensure crops are covered with a net to prevent the ripening fruits being attacked by birds. If frost is forecast after plants have come into flower, protect them by covering with a fleece layer.
Strawberries suffer more than most other fruit in times of drought. If the weather turns dry at any time after the fruits start to swell, water rows thoroughly about once a week until rainfall returns to normal.
PERPETUAL (EVERBEARING) FRUITING STRAWBERRIES
These varieties start to flower at the same time as other strawberries but continue to produce flowers and fruit until the weather becomes too cold in October.
As the main reason for growing these varieties is to obtain fruit in late summer and autumn, it is recommended that any flowers produced before the end of May are cut off to encourage maximum production of fruit from July onwards.
GROWING IN HANGING BASKETS
Ideal for those with limited space growing strawberries in baskets will also reduce attack from slugs and snails. For a 30cm (12") basket use 10 plants. Upon receipt, they can be planted straight away. Incorporate some water-retaining granules and slow-release fertiliser into the compost before planting and ensure they are frequently watered.

Growing Guide
Ornamental Plants and Bulbs
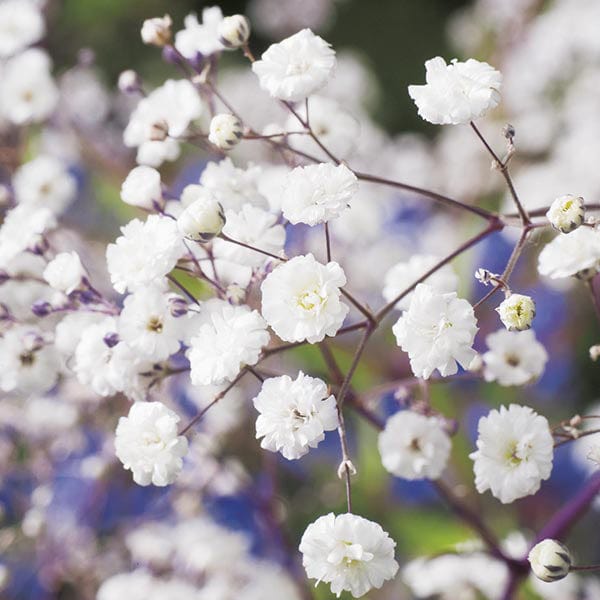
What to do first?
PERENNIAL PLANTS
POTTING ON
We recommend our young plants are potted on into 9cm (3½in) pots, using a good quality, multi-purpose compost. Even though many of these varieties are hardy, at this young stage provide a little warmth in a frost-free place. After 3-4 weeks roots will have filled the pots and, like our potted varieties, will be ready to plant out into their final positions.
CONTAINER PLANTS
POTTING ON
If you plan to set out your plants in beds or borders or to plant them into large tubs, pot
them first into 9cm (3½in) pots. Use any good multi-purpose compost and set each one so
that the top of the plug is just below the surface. All young plants that are to go out into the garden, even the hardy ones, should be hardened off during May. Stand them outside in the day and bring them in again on cold nights before locating them in their final positions outside at the end of May / beginning of June.
CHRYSANTHEMUM PLANTS
POTTING ON
We recommend our young plants are potted on into 9cm (3½in) pots, using a good quality, multi-purpose compost. Each cultivar has different characteristics - some may be tall and thin others short and thick, but each will give good results if handled correctly.
Water in after potting, but also leave to almost dry out before watering again. Keep out of
direct sun for the first few days, until the roots are beginning to develop. Then they will take as much sun as you can give them.
The young plants will have sufficient food in the compost for 3 to 4 weeks and extra feeding before this stage is not recommended.
Planting Out
YOUNG PLANTS Mr Fothergill’s advice on how to plant out and grow on your young plants.
HARDENING OFF It is advisable to harden young plants off before planting them outside or into an unheated greenhouse. Gradually acclimatise plants to outside temperatures by placing them outdoors for a few hours a day and slowly extending the daily period outside over a week or two, depending on how low the temperatures are. Once they are outside permanently and planted out, keep some fleece handy just in case there are still any unusually chilly nights. Depending on the region and local weather conditions, Hardy varieties can often start being hardened off from late March onwards. Half hardy varieties from May. Bare root plants and bulbs do not need to be hardened off and can often be planted any time during their dormant period.
ANNUAL BEDDING STANDARD PLUG PLANTS
Having been carefully nurtured under ideal glasshouse conditions, your plants will be sensitive to both cold and scorching sunshine. Aim to give them a minimum temperature of about 10°C (50°F), a little more for Begonias and Impatiens.
Your plants have arrived ready for transplanting and, although they may be left for a day or two to acclimatise to the new conditions, they should otherwise be potted on as soon as possible.
When transplanting, ease each one gently from its cell, if necessary, pushing it out by inserting a suitable thin implement through the hole in the bottom. Pot them on into multicell trays with large cells or 9cm (3½”) pots. Use any good multi-purpose compost.
As soon as you have transplanted your plug plants, water them in well. Wait until the surface of the compost starts to dry before watering again. If you must grow your plants in a place where they only receive light from one side, such as on a windowsill, turn them regularly so that they grow evenly.
During May, harden the plants off by standing them outside in the day and bringing them in
again on cold nights, before locating them in their final positions outside at the end of May/beginning of June. If planting into containers, add some water retaining gel granules and a slow-release fertiliser.
AUTUMN PLANTING BULBS
If not planting when first delivered, store your bulbs in a cool, dry place until planting time.
While successful in a very wide range of soils, most bulbs are intolerant of poor drainage so, if your soil is heavy, also dig in plenty of sharp sand or horticultural grit. For planting in containers, use general purpose compost. Bulbs are usually most effective when planted in groups.
Always plant bulbs and corms with the pointed growing tip facing upwards. If unsure, face any hair like roots downwards.
CAUTION: Do not eat any of these bulbs and keep out of reach of children.
Contact with all parts of Allium, Bluebell, Hyacinth, Iris, Narcissus and Tulip may cause skin or eye irritation and all parts of Bluebell, Hyacinth, Iris, and Tulip may cause severe discomfort if ingested.
CHRYSANTHEMUM PLANTS
PLANTING OUT
After 3-4 weeks, roots will have filled the pots and, like our potted varieties, will be ready to plant out into their final positions. At this stage, plants will still be susceptible to frosts, so harden off carefully from early May onwards. Choose a sunny, sheltered spot with protection from strong winds and well-drained but fertile soil.
Like other plants - prepare the ground by incorporating plenty of organic matter such as
manure or compost. Before planting apply our Chrysanthemum plant food or another good general fertiliser and rake it in. To plant, dig a hole slightly larger than the pot, remove the pot and place the rootball in the hole, ensuring that the top of the root ball is level with the surrounding soil surface. Back fill, firm well in and water thoroughly. Keep plants well watered until they are fully established.
Most cultivars can be stopped when they are about 15cm (6”) tall. This simply involves removing the top growth by pinching back and taking it down to 3 or 4 leaves up from the base of the plant. This promotes formation of side shoots and creates a bushier, more productive plant. If the plants have formed premature buds, it is best to cut them back hard, at least half their height. This will encourage new shoots to grow from lower down without buds. Four or five of the resulting side shoots should be retained. For blooms, one bud should be allowed to develop on the top of each side shoot with other buds being removed as they appear. For sprays all buds should be allowed to develop.
CONTAINER PLANTS
PLANTING OUT
Most of our container plants prefer a sunny or lightly shaded spot. Your planted up young plants will have roots that have filled their pots after around 3 weeks and our potted plants will have arrived ready to plant up directly into containers, baskets or in the garden.
When you plant up your containers and baskets, multi-purpose compost is usually
best, and we recommend that you mix with it water-retaining gel granules and a slow-release fertiliser. Together they will save you time with both feeding and watering, although additional liquid feeding may still be needed later in the season if plants start to lose vigour.
Always keep your plants free of weeds and water well in dry spells. until they are fully established. Slugs and snails are a major threat to the young growth of many plants and appropriate precautions should be taken.
TOP TIP
Always select an appropriate pot size for the type of plant you have chosen and the look you want to achieve. For instant impact with summer displays, you can pack plants in to give more impact, we suggest about seven-nine plants per 40cm (16”) diameter pot. For permanent displays consider the growth rate and eventual size of the plant.
GARDEN READY ANNUAL AND PERENNIAL BEDDING PLANTS
When you plant up your containers and baskets, mix water-retaining gel granules and a slow-release fertiliser with the compost.
Together they will save you time with both feeding and watering later in the season. As a general rule, allow one plant per 5cm (2”) of container or basket diameter and double this number for baskets where the sides are planted.
If you are planting in your beds and borders, prepare the ground well, removing any perennial weeds. Where the soil is not already rich, dig in some well-rotted manure or compost to add nutrition and help to improve structure. For optimum flowering, either incorporate some slow-release fertiliser at this time or feed regularly through the season. Keep plants well-watered until they are established.
PERENNIAL PLANTS
PLANTING OUT
Most of our perennial varieties will thrive in a sunny spot or in light shade with moist but well-drained soil. Prepare the ground by incorporating plenty of organic matter such as manure or compost. To plant, dig a hole slightly larger than the pot, remove the pot and place the rootball in the hole, ensuring that the top of the root ball is level with the surrounding soil surface. Back fill, firm well in and water thoroughly. Apply a mulch of organic material, composted bark, or compost around the base. Keep plants well-watered until they are fully established.
When planting up containers, a multi-purpose compost is usually best, and we recommend that you mix it with water-retaining gel granules and a slow-release fertiliser.
Together they will save you time with both feeding and watering, although additional liquid feeding may still be needed later in the season.
For individual variety information, please see our catalogues. Many of our varieties are also supplied with care cards attached.
9cm/2ltr POTTED PERENNIAL PLANTS
To plant, dig a hole slightly larger than the pot, remove the pot and place the root ball in the hole, ensuring that the top of the root ball is level with the surrounding soil surface. Back fill, firm well in and water thoroughly. Apply a mulch of organic material, composted bark, or compost around the base. Keep plants well-watered until they are fully established.
When planting up containers, a multi-purpose compost is usually best, and we recommend that you mix it with water-retaining gel granules and a slow-release fertiliser. Together they will save you time with both feeding and watering, although additional liquid feeding may still be needed later in the season.
SHRUBS
Prepare the ground well as for perennials. Our potted shrubs can be planted at any time of the year provided the ground is not frozen or waterlogged.
Choose a suitable planting spot and again plant as you would perennials. Water well and continue to do so for the first season especially, until established. We recommend a good mulch with compost or well-rotted manure to help retain moisture.
SPRING PLANTING BULBS & TUBERS
If not planting when first delivered, store your bulbs in a cool, dry place until planting time.
While successful in a very wide range of soils, most bulbs are intolerant of poor drainage so, if your soil is heavy, also dig in plenty of sharp sand or horticultural grit. For planting in containers, use general purpose compost. Bulbs are usually most effective when planted in groups.
Always plant bulbs and corms with the pointed growing tip facing upwards. If unsure, face any hair like roots downwards.
CAUTION: Do not eat any of these bulbs and keep out of reach of children. All parts of Nerine may cause stomach upset if eaten and contact with the sap of these plants may result in skin irritation.
Further information by variety
SPEEDPLANTERS
These are delivered ready for immediate planting into hanging baskets and containers. Place the speedplanter into the basket or container, topping up with a little compost where needed and water well. Keep in a sheltered place for a week or two until established.
TRIXI PLANTING COMBINATIONS
Suitable for all basket and container planting, 3 different varieties are produced in one plug plant. Plants are quick to establish and are very weather tolerant. Flowering from early summer into early autumn. Five young plug plants will fill a 35cm (14") basket or container. Place your basket or container in a sunny spot for best results.
CHRYSANTHEMUM PLANTS
EARLY FLOWERING (OUTDOOR/GARDEN) CULTIVARS
Early flowering chrysanthemums bloom outdoors in August and September in the open ground and can be planted out in the garden from May (earlier if protected). Plant firmly about 60cm (2') apart. You can plant closer if you want blooms for cutting or further apart if you need to fill a large area.
Insert a cane, tie the stem to it and water in. Feed every two to three weeks until August when the buds will be starting to form. If you give too much feed you get a larger but softer plant, which can be more susceptible to disease.
LATE FLOWERING ( INDOOR / GREENHOUSE) CULTIVARS
Late flowering chrysanthemums are grown in pots outside until frost is likely, then are moved into the greenhouse to flower in November and December. On arrival they can be treated the same as garden ones, but repotted as needed to a final pot size of approximately 23cm (9"). They can then be stood outside.
Four side shoots should be retained with only one bud at the top of each stem being
allowed to develop if you want blooms. For sprays you simply let all the buds develop. The
plants should be fed every two to three weeks until early September when the buds start to form. When buds start to show colour, about the end of September, move them back into the frost-free greenhouse. Give plenty of ventilation to keep the humidity down and prevent damping of the petals.
HARDY CULTIVARS
All these cultivars are completely hardy, given a good first season’s growth to build up the root system. The newly arrived cuttings should be treated the same as the other garden ones to start with. They can be stopped when they are about 15cm (6") tall. From the end of May onwards they can be planted out about 46cm (18") apart, the taller ones will require staking. After flowering, cut them back to about 15cm (6") above where the single stem breaks into flowering stems. When they start growing again in the spring the old stems can be cut right down to near ground level. Every few years they can be divided up or new young shoots rooted.
GARDEN BUSH (POT MUMS)
These are dwarf free-flowering cultivars suitable for pots or border planting.
Pot first into 9cm (3") pots then when potting on, put one into a 13cm (5") pot, three in a 17½cm (7") pot or five in a 25cm (10") pot. Plants can be stopped to encourage breaking. Feeding should be carried out every couple of weeks through the summer to produce the stunning large cushions of flower in the autumn.
WINTER CARE
For cultivars grown outdoors in the open ground, after flowering has finished cut down to 5cm (2") above where the single stem breaks into flowering stems.
Lift with a fork, shake off any loose soil and remove all the old leaves and any old basal shoots. Pot up or plant in the border in a cold greenhouse or very sheltered position and keep on the dry side throughout the winter. In spring the main stem can be cut down again to about 15cm (6") from the ground and the plants watered.
CAUTION: Chrysanthemum plants can be a skin allergen.
SPRING PLANTING BULBS & TUBERS
(Caution: ornamental bulbs can be harmful if eaten)
ANEMONE CORONARIA - Soak these bulbs for several hours before planting, they will start growing more quickly than if planted dry.
Plant in full sun in well-drained soil. Plant 7-8cm (3.5") deep and 10-15cm (4-6") apart.
BEGONIA – Start off indoors in pots during March then plant out in late May. Space them
20-30cm (8-12") apart. Plant in light shade or, at least, shade during the hottest part of the day. Can be overwintered, lift before the first frosts in Autumn.
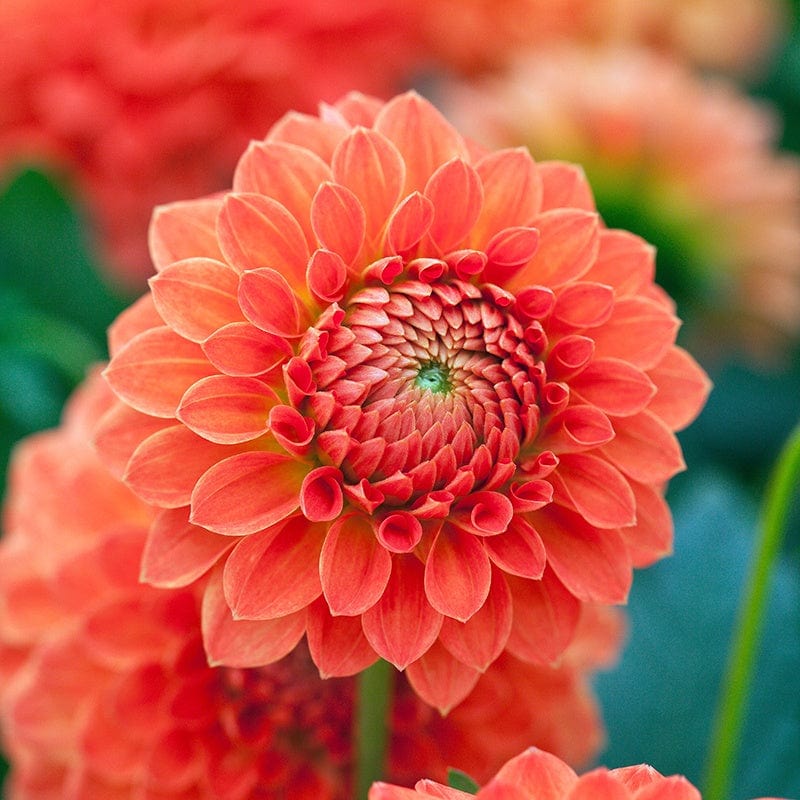
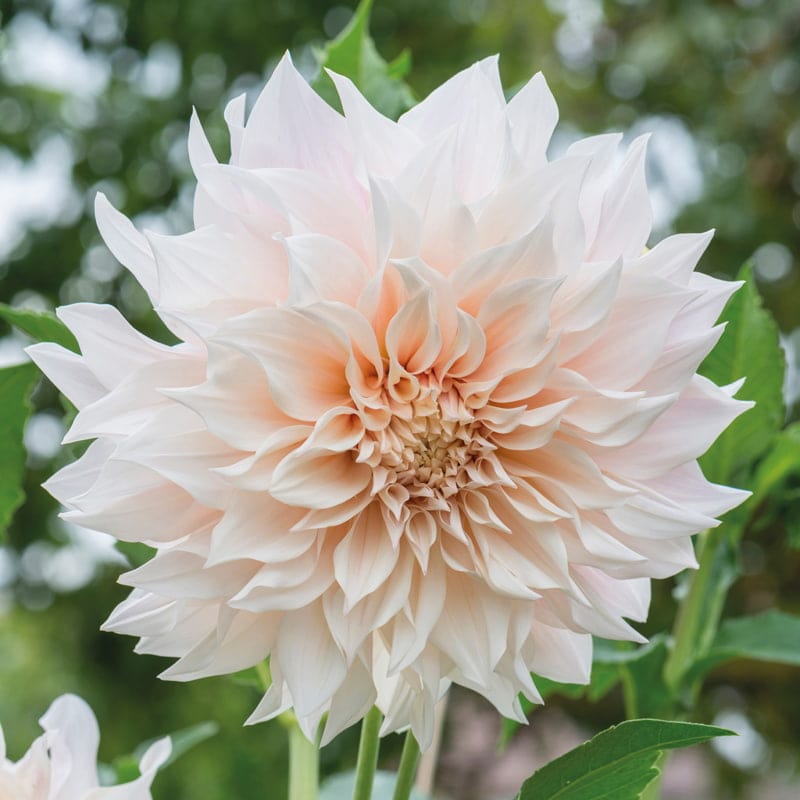
DAHLIA – Start off indoors or a sheltered position outdoors, in pots, in March/April. As
they grow, pinch out the tips of the main shoot. Remove down to the first pair of leaves. Its also a good idea to remove all but 5 shoots sprouting from each tuber to ensure a strong
and vigorous plant with lots of flowers.
Dahlias thrive in most sunny situations and do best in fertile soil, with moisture and good
drainage. Set out your potted tubers, spacing them approximately 60cm (24") apart (depending on the expected final size of the variety) and with the crown about 5-7cm (2- 3") below soil level.
Feed regularly, using a high nitrogen liquid fertiliser while plants are developing and
changing to a tomato type fertiliser during the main flowering period. Tie plants to their stakes as they develop and dead head regularly to prolong flowering.
EUCOMIS – These dry bulbs are best started in pots and later planted out when in growth. Plant out in full sun or part shade 25cm (10") apart with the bulb at a depth of 20cm (8in). Because these are half-hardy dig up bulbs if not in a sheltered position or move pots indoors and keep dry until the following spring.
FREESIA – Plant inside in pots Jan-April, March in a cold greenhouse and outside from
April onwards. Space corms 5-8cm (2-3") apart and 5cm (2") deep in a well-drained,
sunny and sheltered position. As they grow provide some support such as twiggy sticks or wire. Not fully hardy, Freesias will need lifting either when the leaves turn yellow or after first frosts and storing in a dry frost-free place.
GLADIOLUS – Gladiolus require an open sunny position in a well-drained soil. Plant in
groups 10-15cm (4-6") apart and 10-15cm (4-6") deep. The lighter the soil, the deeper they should be planted.
LILIES – Lilies prefer acid to neutral soil. Avoid wet soils especially in spring. As lily bulbs never go completely dormant, plant them as soon as possible. Set them 15cm (6") apart and at about three times the depth of the bulb. Choose a site in full sun or partial shade.
NERINES – Nerines need a well-drained soil in full sun and a sheltered position. Plant the
bulbs with the top of the bulb just below the soil surface and 15cm (6") apart.
SPARAXIS – Plant in moist but well drained soil in full sun. Plant the bulbs 10cm (4") deep either directly into the garden or into pots in a cool greenhouse. If left outside, mulch with chipped bark to protect them from the cold wet weather over winter. Plant in groups for best effect.
TRITELEIA (BRODIAEA) – Plant bulbs at a depth of 7cm (3") and 10cm (4") apart in a warm sunny position in well-drained soil. Plant in groups for best effect.
9CM/2LTR POTTED PERENNIAL PLANTS
ACANTHUS - Plant in partial shade/shade. Space at 60cm (24") apart. Correct positioning is vital as plants do not like being moved once established.
ACHILLEA - Prefers a sunny, well-drained site. Space at 30-45cm (12-18") apart.
ACTAEA - Grow in cool, moist, moderately fertile soil, enriched with organic matter. Water thoroughly in dry weather. Space at 45-60cm (18-24") apart.
AGAPANTHUS - Plant in full sun and fertile, well-drained, light soil. Excellent for container planting. Space at 40-60cm (16-24") apart. (Caution: Harmful if eaten.)
AGASTACHE - Prefers a sunny, well drained site. Space at 25-30cm (10-12") apart.
ALCHEMILLA - Tolerant of most soil conditions, including heavy clay, plant in sun or part shade. Space at 30-45cm (12-18") apart.
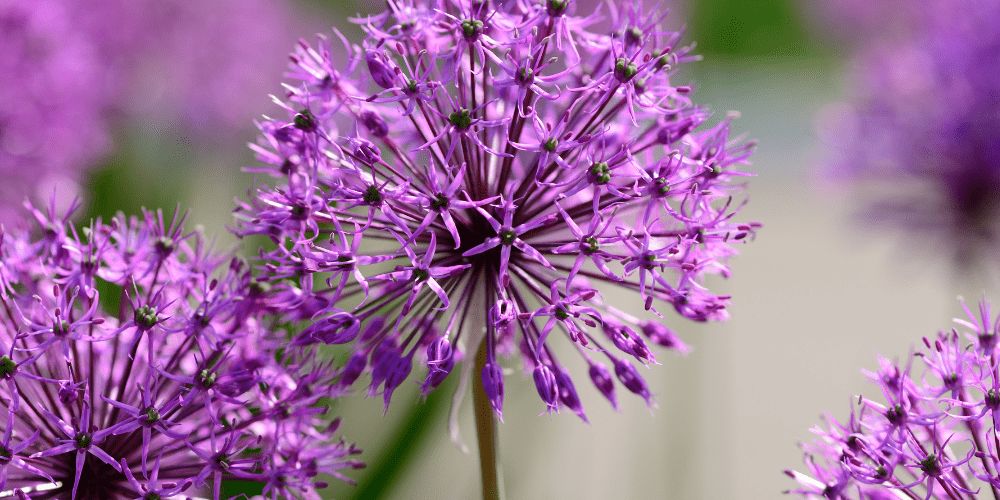
ALLIUM - A perennial (not a bulb variety) best grown in a sunny or partial shade position. Space at 40cm (16") apart. (Caution: Toxic to pets if eaten.)
AMSONIA - Grow in moist well-drained soil in full sun or light shade. Can tolerate periods of drought. Space at 30-40cm (12-16") apart.
ANTIRRHINUM - Plant in full sun in a well-drained soil. Space at 20-30cm (10-12") apart. Prune back in late spring to promote bushier plants.
AQUILEGIA – Grow in fertile, moist, well-drained soil in sun or part shade. Space at 30-40cm (12-16") apart.
ASTER - Plant in well-drained soil in a sunny position or partial shade. Space at 40cm (16") apart – good spacing will aid circulation and help prevent mildew.
ASTRANTIA - Quick to clump and excellent for cut flowers. Requires full sun or partial shade with well-drained soil. Space at 30-40cm (12-16") apart.
CAMPANULA - Plant in sun or partial shade. Space low growing varieties 25cm (10") apart, tall varieties up to 50cm (20") apart.
CATANANCHE - Plant in full sun. Perfect in well drained, light soils. Once established it has good drought resistance making it ideal for free draining soil. Space at 40-45cm (16-18") apart.
CENTAUREA - Plant perennial Centaurea in moist but well drained soil and space at 45-60cm (18-24") apart.
CHRYSANTHEMUM – Will grow well in any moist, well-drained soil. Space at 45-60cm (18-24") apart. (For further details see Chrysanthemum section, top of this page.)
CIRSIUM - Plant in full sun or partial shade. Space at 40-60cm (16-24") apart.
COREOPSIS - Plant in well-drained soil in full sun. Space at 15-45cm (6-18") apart, depending on variety.
CRAMBE - Grow in moist, but well-drained soil in sun or part shade. Plant 100-150cm (40-60") apart.
CROCOSMIA - Plant in any well drained soil in full sun. Space at 30cm (12") apart.
DELPHINIUM - Remove flower spikes after flowering to promote a second flush of blooms. Likes sun and fertile, well-drained soil. Space at 40-50cm (16-20") apart. (Caution: Harmful if eaten.)
DIANTHUS - Plant in a sunny spot and prefers a soil enriched with well-rotted manure or garden compost. Plant 15-30cm (6-12") apart. (Caution: Skin allergen.)
DIASCIA - Grow in moist, but free-draining soil in full sun. Plant at 30-45cm (12-18") apart. Closer spacing in containers.
DIGITALIS - Plant in a bright or partially shaded spot in well-drained soil. Suitable for planting under trees and shrubs as plants are quite drought tolerant. Space at 25cm (10") apart. (Caution: Toxic if eaten.)
ECHINACEA - Plant in a sunny position in well-drained soil. Space at 25-30cm (10-12") apart.
ECHINOPS - Ideal for planting spot with fairly dry, well-drained soil that is poor to moderately fertile. Full sun is essential as is protection from winter wet. Space at 45-60cm (18-24") apart.
ERIGERON - Plant in a sunny position in well drained soil. Space at 45-60cm (18-24") apart.
ERYNGIUM - Does best in full sun and fertile, well-drained soil. Space at 30-40cm (12-16") apart.
ERYSIMUM - Deadheading will help to keep plants looking tidy. Likes sun and well drained soil. Space at 30-40cm (12-16") apart.
EUPHORBIA - Plant in sun or shade. Space at 40-60cm (18-24") apart. (Caution: Irritant to skin/eyes; harmful if eaten.)
GALLIUM - Plant in a partly shaded position in moist, well-drained soil. Space at 25-30cm (10-12") apart.
GAILLARDIA - Plant in a sunny position. Space at 40-45cm (16-18") apart.
GAURA - Plant in sun or part shade. Space at 40-45cm (16-18") apart.
GERANIUM - Plant in a sunny or partially shaded spot. The soil/compost should be free draining and kept just moist. Space at 25-30cm (10-12") apart.
GEUM - Does best in a sunny location and prefers moist but well-drained soil. Space at 30cm (12") apart.
HELENIUM - Need full sun and any reasonably fertile, moist but well-drained soil. If plants are dead headed, they will continue to bloom until September. Stake plants as they grow. Space at 50cm (20") apart.
HELIOPSIS - Quick to establish in rich, moisture retentive soil in full sun. Plant 45-60cm (18-24") apart.
HESPERIS - Plant in a sunny position. Space at 45-60cm (18-24") apart.
HEUCHERA - Very long-flowering and its size makes it perfect for pots and window boxes or ground cover in an area of dappled shade. Space at 30-40cm (12-16") apart.
KNAUTIA - Plant in a sunny position. Space at 40-45cm (16-18") apart.
LAVENDER - Trim plants after flowering to maintain a compact habit. Grow in full sun and fertile, well-drained soil. Space at 25-30cm (10-12") apart.
LIBERTIA - Comb or rake off any old, tired or dead leaves and flowers in spring. If needed evergreens can be cut back (by up to half) at almost any time from April to July. Best grown in moist, well drained soil in full sun. Space at 60cm (24") apart.
LOBELIA - Perfect for partial shade in moist but well drained soil. Space at 30-40cm (12-16") apart.
LUPIN - Plant in a bright and sunny position in rich, free-draining soil. Cut back after flowering to encourage a possible further flush. Space at 30-40cm (12-16") apart. (Caution: Harmful if eaten.)
LYSIMACHIA - Performs best in humus-rich, moist soil that does not dry out in summer. Space at 45-60cm (18-24") apart.
MONARDA - An excellent perennial for the late summer border. Grow in moist soil and full sun. Remove spent flowers to keep plants looking tidy. Cut back to a couple of inches above soil level when the first frosts appear. Mulch in the spring. Space at 50cm (20") apart.
NEPETA - Plant in full sun and trim after flowering to keep plants compact. Space at 45-60cm (18-24") apart.
OMPHALODES - Plant in moist, humus rich soil in partial shade. Space at 30cm (10-12") apart.
PAPAVER - For best results make sure they will be in the sun for most of the day. Any soil is suitable provided it has reasonable depth and is well-drained. The foliage dies away soon after flowering and should then be cut off. Space at 30-40cm (12-16") apart.
PENSTEMON - Great for borders or containers. Remove flower stems after flowering. Likes sun and fertile well-drained soil. Space at 30-40cm (12-16") apart.
PEROVSKIA - Plant in full sun and space and space at 45-60cm (18-24") apart.
POLEMONIUM - Easy to grow in either sun or part shade. Deadhead flowered stems to prevent self-seeding. Space at 30-40cm (12-16") apart.
PHLOX - Plant in a sunny position and grow in fertile, well-drained soil. Keep well-watered during dry weather and remove faded flowers to encourage further blooms. Mulch in spring. Space at 30-40cm (12-16") apart.
PHYSOSTEGIA - Plant in a sunny spot and cut back to the base in winter. Space 30-40cm (12-16") apart.
POTENTILLA - Plant in any well drained soil in full sun. Space at 45-60cm (18-24") apart. (Caution: Fruits are ornamental, not to be eaten.)
PRIMULA - Grow in moist soil in sun or partial shade. Ideally needs moist soil during the growing season and dry soil in the winter. Space at 20-25cm (8-10") apart. (Caution: Skin allergen.)
PULSATILLA - Grow in a sunny well-drained position. Space at 30cm (12") apart.
RUDBECKIA - Easy to grow in full sun or partial shade. Space at 40-50cm (16-20") apart.
SALVIA - Plant in a sunny position in well-drained soil/compost. Excellent for adding to the front of borders or for including in mixed perennial container plantings. Space at 20-25cm (8-10") apart. (Caution: Rosemary - Salvia rosmarinus is a skin allergen.)
SCABIOUS - Prefers moderately fertile, neutral to slightly alkaline soil. Dead head regularly to encourage further blooms. Space at 30cm (12") apart.
SEDUM - Perfect for a spot in full sun and planted in well-drained soil. Plant 45-60cm (18-24") apart.
STIPA - Plant in well-drained soil in full sun. Space at 30-40cm (12-16") apart. Wait until early spring to cut back any brown or dead leaves.
TELLIMA - Prefers a partially shaded spot so ideal for a woodland border. Will tolerate drier positions in shade, and full sun in moist soils. Space at 45-60cm (18-24") apart.
TROLLIUS - Plant in moist soil in sun or part shade. Space 40-60cm (18-24") apart.
TULBAGHIA - Grow in a sunny well-drained position. Space at
30cm (12") apart.
VERBASCUM - Grow in full sun in poor, alkaline, well-drained soil. Larger plants will require support. Space at 40cm (16") apart.
VERBENA - Does best in a sunny location and prefers moist but well-drained soil. Space at 30-40cm (12-16") apart. Cut down in spring as new growth emerges from the base.
VERONICA - Clump forming. Remove faded flower stems. Suitable for cutting. Likes sun and well-drained soil. Space at 30-40cm (12-16") apart.
VERONICASTRUM - Plant in moist, well drained soil in sun to partial shade. Space at 45cm (18") apart.
AUTUMN PLANTING BULBS
(Caution: ornamental bulbs can be harmful if eaten)
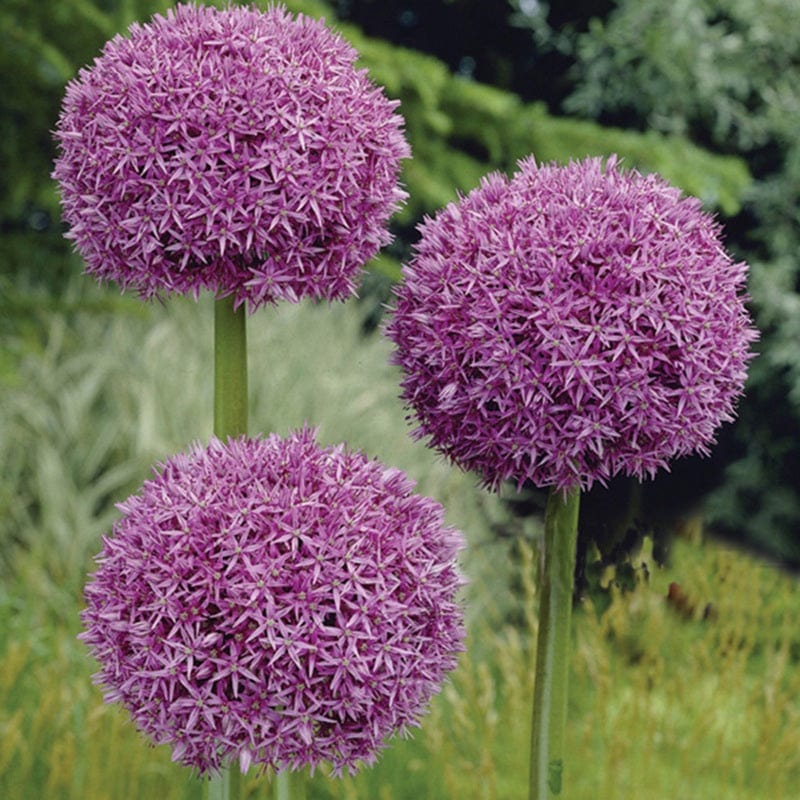
ALLIUM - Plant at approximately three times the depth of the bulb. Space them 15-30cm (6-12") apart. Plant in a sunny spot.(Caution: Toxic to pets if eaten.)
ANEMONE - Anemone require a warm sheltered spot with well-drained, humus rich soil in sun or partial shade. For best results soak the tubers overnight before planting them with ‘claws’ upwards, 5cm (2") deep and 10cm (4") apart.
BLUEBELL - (Hyacinthoides non-scripta) - Bluebells prefer a semi-shady position, and soil that has been enriched with plenty of leafmould or well-rotted garden compost. Plant 10-15cm (4-6") deep and 10-15cm (4-6") apart. (Caution: Harmful if eaten.)
CAMASSIA - Plant at least 10cm (4") deep and 15cm (6") apart, in fertile, well-drained, humus rich soil, ensuring that there is good drainage in the soil. Avoid plants becoming water-logged.
CHINODOXA - Find a position in full sun or semi shade and with well-drained soil. Plant 8cm (3") deep and 7cm (2.5") apart.
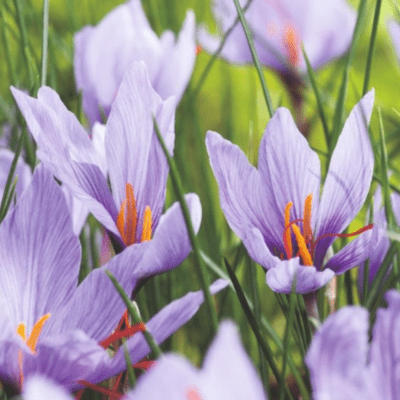
CROCUS - Plant 7-10cm (3-4") deep and 7cm (3") apart. Give them a position in full sun or partial shade and well-drained soil. (Caution: Toxic if eaten.)
CYCLAMEN - Plant 5cm (2") deep and 5-8cm (2-3") apart in partial shade in moderately fertile, humus rich, well-drained soil. Cyclamen do not like excessive wet.
FRITILLARIA - Plant 12cm (5") deep and 45cm (18") apart. Handle the corms carefully as they are prone to bruising. Put some coarse sand in the planting holes and place the bulbs sideways. These corms are very intolerant of wet conditions. They must be kept dry in their dormant period.
HYACINTHS - Plant 10cm (4") deep and 20cm (8") apart in September or October in a sunny or partially shaded position. Ideal plants for the mixed or herbaceous border as well as patio containers. (Caution: Skin irritant.)
IRIS - Plant at twice the height of the bulb and 5-10cm (2-4") apart in well-drained, moderately fertile soil in full sun to dappled shade. (Caution: Harmful if eaten.)
MUSCARI - Plant 7.5cm (3") deep and 10cm (4") apart. Planting time September or October. Thrives best in full sun in any well drained soil.
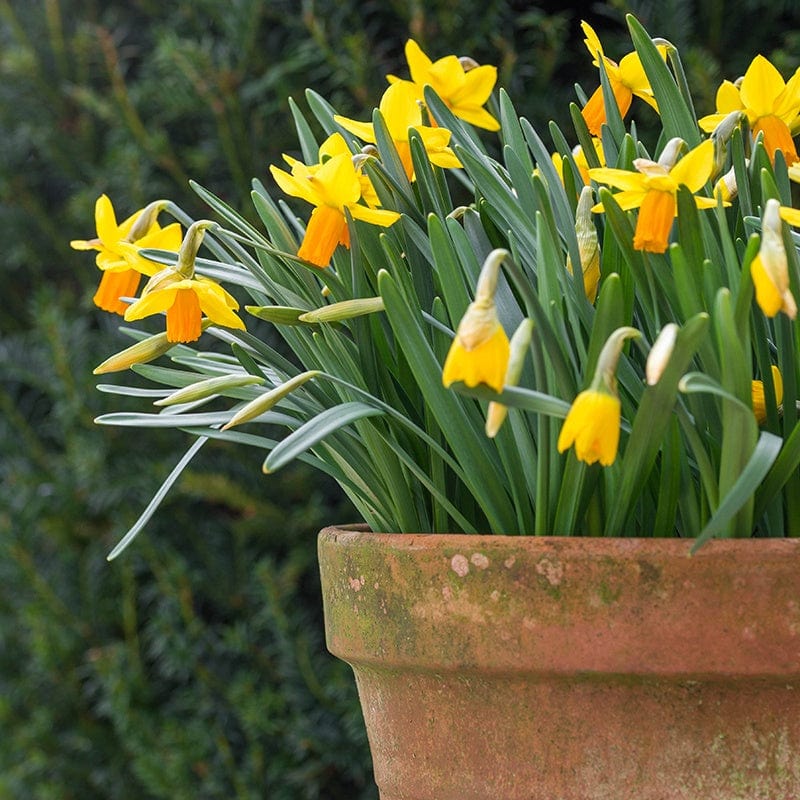
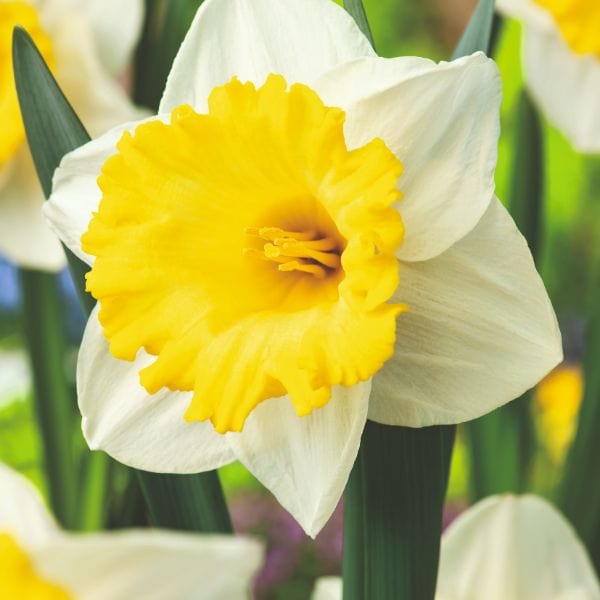
NARCISSUS - Plant in September and October at two times the depth of the bulb and 10-12cm (4-5") apart. Perfect for beds and borders, in sun or part shade. (Caution: Harmful if eaten, skin irritant.)
SNOWDROP - Snowdrops (Galanthus nivalis) prefer a semi-shaded position, in a moist retentive soil enriched with plenty of leafmould or well-rotted garden compost. Plant 10cm (4") deep and 10cm (4") apart. (Caution: Harmful if eaten.)
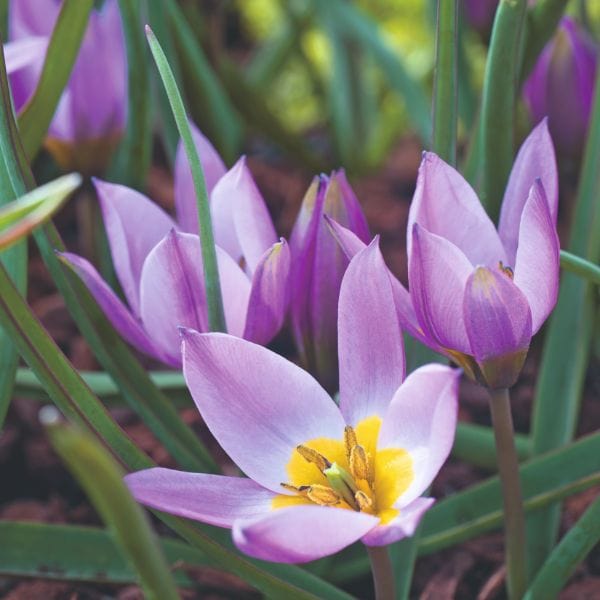
TULIPS - NB: Do not plant Tulips until November/December. Plant 10-15cm (4-6") deep and 20cm (8") apart, in November to December in full sun. Planting sooner can result in frost damage to the growing shoot. Dead head after flowering. Tulips are best lifted after the foliage has died down and the bulbs stored dry through the summer. (Caution: Harmful if eaten, skin allergen.)


