


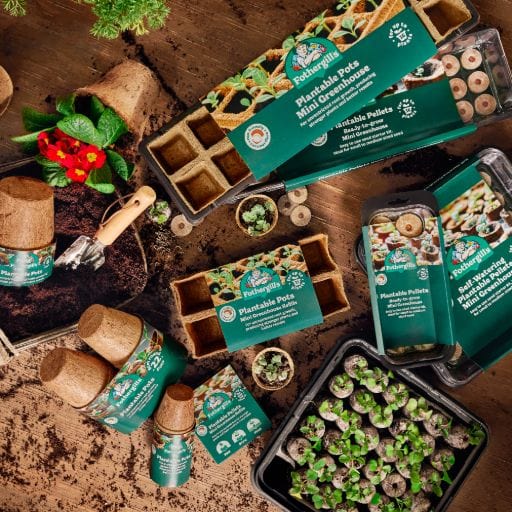


Welcome to the Fothergill's Recipe Hub


Related Articles


Cucumbers are one of summer’s most refreshing crops - crisp, juicy, and easy to grow once you understand their needs. Whether climbing inside a warm greenhouse or sprawling across an outdoor bed, they’re a rewarding choice for UK gardeners who enjoy a steady harvest of tender fruit all summer long.
When choosing your variety, consider where and how you’ll be growing them.
- Greenhouse cucumbers, such as Telegraph Improved, Carmen, Mini Munch, and Emilie, produce smooth, seedless fruits and thrive in steady warmth. These are usually all-female F1 hybrids that don’t need pollination.
- Outdoor cucumbers, including Marketmore and Burpless Tasty Green are tougher, ridged, and rely on insect pollination.


Onions are a must-grow vegetable. Why? Well, where do we begin? To start, onions are very easy seeds to grow and properly prepared bulbs will store reliably for up to six months. As with seed potatoes, there’s something deeply satisfying about the weighty harvest you can get from just a small area, and as the starting point to so many recipes, there’s every reason to grow more of your own! So let’s not hang about - read on to find out how to grow onions in your garden!
Soil Preparation
Onions thrive when planted or sown in a free-draining soil, in a sunny spot. Be sure to clear the area of weeds to allow your onions to grow in the very best conditions. We also recommend using plant fertiliser on your soil with plenty of organic matter to benefit your onions’ root system!
How to Sow Onion Seeds
For the earliest start, sow onion seeds into plug trays or pots of potting mix to transplant later as seedlings. This avoids the need for thinning out, encourages a more economical use of seeds and, given the protection of a greenhouse or cold frame, means sowing can start at least a month sooner in late winter.
Fill trays with seed-starting or general-purpose potting mix, pressing it down into the cells for a solid fill. Sow a pinch of 4-8 seeds per cell, then cover with more potting mix to a depth of 1/4 - 1/2 an inch (1cm). Water with a fine spray.
Transplant the resulting seedlings while they’re still quite small to avoid disturbing the delicate roots. Make holes into the prepared ground, planting each clump of seedlings about 4in (10cm) apart before firming in and watering.
How to sow onion seeds outside
Direct sowings can commence in spring as soon as the soil is workable and has warmed up a little. Rake the soil level then mark out seed drills about 1/2 inch (1cm) deep and 1ft (30cm) apart. Sow the seeds very thinly, cover back over then water along the rows to settle them in. Thin the seedlings in stages until they’re about 2in (5cm) apart for lots of smaller onions or 4in (10cm) apart for fewer but bigger bulbs.
Covering early sowings or transplants with row cover or garden fleece helps to speed things along at the start of the season, and may help reduce the tendency to bolt (or flower), which makes bulbs too tough to eat.
Some especially hardy varieties of onion may also be sown in late summer to sit through winter and give an extra early crop in spring or early summer.
How to Plant Onions
Wondering how to plant onion sets? In many regions, you may be able to buy onion transplants for immediate planting. Another alternative is to plant shallot onion sets. Sets are part-grown onions that are super-easy to grow and save time sowing. On the downside, they don’t store as well as onions grown from seed or transplants, and they carry a higher risk of bolting. There are, however, heat-treated varieties available that are more resistant to bolting. Nevertheless, sets are clear winners when it comes to convenience.
Plant sets in mid-spring into prepared, weed-free ground that's warmed up a little. Leave just the tips poking up from the ground and space them 2-4in (5-10cm) apart, depending on the final size of bulb you’re after. Some sets may also be planted in early autumn, to give a harvest up to two months earlier next summer.
Plant Care
Onions transplanted from module trays may be left as they are or thinned out once they’ve grown on to give bigger bulbs. You can enjoy the thinnings as green (or spring) onions.
As shallow-rooted plants, onions must be kept watered in dry weather. Keep on top of weeds too, hoeing carefully between rows, then hand-weeding within the rows so as not to damage the roots.
How to Harvest Onions
The best way to tell when harvest time is approaching is when the leaves of your onions are bent down towards the ground. Bulbs will continue to swell over the next few weeks before colouring up nicely in time for harvest.
Shop Onion Seeds & Plants at Mr Fothergill’s
What are you waiting for? Your growing journey starts right here at Mr Fothergill’s! Shop our onion seeds and onion sets today and let us help get your onion garden going.
If you have any further questions about how to grow onions, how to sow onion seeds or have any curiosities about any of our other products, don’t hesitate to contact us or take a deeper dive into our gardening blog!


If you’re wondering how to grow your own vegetables for your roast dinner, here we will look at some of the best vegetables to grow for a Sunday roast and how to enjoy success with the whole process.

Microgreens are easy to grow, allowing you to enjoy fresh, tasty, nutritious salad greens on your windowsill year-round. They’re simple to manage for beginner green thumbs and a great way to introduce the little ones to gardening.
When most people think of microgreens, varieties such as cress typically spring to mind. But there is a wide range of different microgreen types to choose from. If you’ve ever wondered, “What are microgreens?” and what the best types to grow are, we’ve got all the answers.
Read on to learn more about the wonderful world of the many microgreen types.
What Are Microgreens?
The first step in growing microgreens is understanding what they are. They’re not a plant class but young seedlings of vegetable plants and herb seeds, harvested just after their first true leaves develop; the aim is to give you salad leaves to enjoy in the winter months, when growing full-size plants may not be possible.
Unlike sprouts, which are eaten whole (including the seed and root), microgreens are grown in soil or a growing medium and harvested above the root. They pack intense flavour and high concentrations of nutrients, making them a great addition to salads, sandwiches, and even smoothies.
Whether you’re a beginner or an experienced gardener, microgreens offer a fast-growing, space-saving, and delicious way to enhance your meals.
Microgreen Types: What Are the Best Microgreens to Grow?
Microgreens come in many different flavours, textures, and colours. Whether you want something peppery, mild, citrusy, or earthy, there’s a microgreen for you.
Let’s run through all the main microgreens types you can grow at home, from salad leaves to herbs and even baby vegetables. In each case, the exact instructions on how to grow your microgreens may vary slightly, but the broad strokes of sowing microgreens are simple and easy to follow.
Small-Leaved Salad Vegetables
Small-leaved microgreens, such as cress, are popular salad vegetables for kitchen windowsills due to their easy maintenance. They’re super simple to grow and a great gardening project to get the kids involved in your family garden.
- Cress: The easiest microgreen to grow, with a peppery, tangy taste, which works brilliantly in salads (as well as egg and cress sandwiches, of course!).
- Radish: Spicy and crunchy, radish microgreens add a kick to salads.
- Mustard: A bold, spicy green that works well in sandwiches and salads.
Larger-Leaved Salad Vegetables
It’s also possible to grow your favourite larger-leaf salad vegetables as microgreens. By harvesting the leaves of these plants when they’re just young seedlings, you’ll get a regular supply of tasty greens. The leaves may be small, but they’re tender and mild-flavoured. There’s also the nutritional boost of eating seedlings, which are known to have more concentrated nutrients. This means more vitamins and minerals for you.
- Lettuce: The mild and tender leaves are a perfect addition to salads
- Kale: Rich in vitamins and a great way to add nutrition to any meal.
- Pea Shoots: Sweet and tender, these taste just like fresh peas.
- Spinach: Soft, slightly earthy, and nutrient-rich.
The benefit of growing larger-leaved plants as microgreens is that you can do it all year round. You’ll have fresh, healthy, and tasty greens even if you don’t have access to the garden or cold weather makes it impossible to grow full-sized plants.
Herbs
Herbs make excellent microgreens and are very happy growing on your kitchen windowsill! Try experimenting with various varieties in your meals.
- Red Leaved Basil: Adds a pop of colour and a mild, herby flavour.
- Chives: Mild onion-like taste, perfect for garnishing.
- Coriander: Citrusy, slightly spicy (hopefully, you haven’t got the soap gene!), and an excellent garnish for Mexican and Asian dishes.
Greens From Other Vegetable Varieties
Did you know that you can also grow microgreens from other vegetable seeds, including carrot seeds, beetroot seeds, or chard seeds, without needing to grow the actual vegetable? To save space on your windowsill, you simply grow the tasty little shoots.
- Chard Bright Lights: They have the same flavour as chard, as well as attractive red and yellow coloured stems.
- Beetroot Greens: Mild and earthy, with beautiful red stems
- Carrot Greens: These microgreens are packed full of vitamins and antioxidants with an intense carrot-like flavour. The feathery leaves can be added to everything from soups and stews to salads and work particularly well in pestos.
Baby vegetables
Lastly, we have microgreens that come from the seeds of other baby vegetables. A great example is baby broccoli plants, which you’ll harvest once the seedlings are no more than a few centimetres tall. You’ll be amazed at how much they taste like broccoli but without the bitterness of the full-grown vegetable. They have an appealing texture and can be added to any meal.
- Baby Cauliflower: Delicate and slightly nutty, adds texture to salads.
- Baby Cabbage: Crisp and slightly sweet, works well in slaws.
- Baby Courgette: Tender and mildly sweet, perfect for salads or stir-fries.
If you’re looking for the best microgreens to grow, consider factors like ease of growth, flavour, and nutritional benefits. Radish, pea shoots, broccoli, mustard, and cress are some of the top choices for their quick growth, strong flavours, and high nutrient content.
[[ products ]]
Are Microgreens Easy to Grow?
One of the biggest advantages of microgreens is how easy they are to grow. You don’t need a garden—just a windowsill, a container, some soil or kitchen roll, and seeds. You can have fresh greens in as little as 7–21 days with minimal effort.
Microgreens are ideal for beginners, children, and anyone without outdoor space. They require little maintenance, grow quickly, and provide a fresh supply of homegrown greens even in winter.
How to Grow Microgreens
All you need to grow microgreens is a container (a seed tray or even a recycled food tub), a window sill, some paper towels, water and, of course, your seeds. Growing microgreens is easy, as they’re a reasonably low-maintenance crop–just keep the paper towels moist and harvest them as soon as they reach the desired size.
For more detailed instructions on how to get your own microgreen garden and enjoy your favourite leafy vegetable during colder months, read our step-by-step guide on how to grow microgreens.
Get in touch
Microgreens are an excellent way to add homegrown nutrition to your diet with minimal effort. Whether you’re a seasoned gardener or just starting, these tiny greens pack a punch in both flavour and health benefits.
We’re excited about planting the seeds of plenty of gardening ideas to help get the whole family involved in your outside space! Gardening is for everyone! So let us help you and the kids blossom into green-thumbed growers as you watch your tiny, tiny seedlings reach their full potential in your very own garden.
Whether you’re keen to create a vibrant playground for bees and butterflies with our range of flower plants or show the little ones just how rewarding it is to watch your easy-to-grow veg seeds make their way all the way from the ground to the kitchen, Fothergill's has got all of your gardening essentials to get you started.
If you have any further questions about the microgreen types or any of our gardening products, don’t hesitate to contact us or read our blog!

It’s quick-growing, fuss-free and can be grown just about anywhere. What are we talking about? Lettuce of course! Whether you’re growing it for sweet, firm hearts or for a pick-and-mix of leaves, you won’t want to run short of this dependable staple. So, if you fancy growing more of it you’re in the right place - here’s our sowing-to-harvest guide to lettuce! Read on or watch the video for more.
[[ products ]]
Soil Preparation
You can grow lettuce in any well-drained, fertile soil - soil improved over time with plenty of compost is ideal. You can even grow lettuces in pots or tubs of potting soil. Lettuce prefers a bright, open position with good air circulation to promote strong, disease-free growth.
Lettuce is a cool-season crop, so in hot climates, you may get better results growing it in a cooler, shadier spot, especially as the young plants start out. Either way, lettuces don’t take long to reach maturity, which makes them an excellent choice for growing in between slower-to-establish crops such as corn or leeks.
Sowing
When to sow lettuce seeds in the UK
Wondering when to sow lettuce seeds in the UK? Well, we recommend that you make the earliest sowings under cover from late winter to grow on in greenhouse or hoop house beds for a super-early harvest. Then from early spring, it’s time to sow for growing outside. Sow in batches, about once a month, for a continuous harvest. The last sowing of the season, made at the end of summer, will be of winter lettuces.
Direct sowing lettuce
Sowings may be made directly into prepared soil or into module trays of multipurpose potting soil. To sow directly, remove any weeds then rake the soil level to a fine, crumbly texture. Mark out shallow drills, 8-12 inches or 20 to 30cm apart, using a string line as a guide if this helps.
Then, sow the tiny seeds in clusters – a pinch of seeds every 4in or 10cm. Backfill the seed drills, and label them with the variety and water. Thin the seedlings once they’re up to leave the strongest plant at each point. Then a few weeks on, thin again to leave plants 8-12 inches - or 20-30cm - apart.
Sowing into plug trays
We’ve all dealt with not having enough room in our gardens for new plants, but there’s always a way around it! You want to give your lettuce the space it deserves, so why not get them started in plug trays and plant them in your garden further down the road?
You’re going to want to fill the plug trays with soil then sow a pinch of about 3-5 seeds into each plug, onto the surface. Cover the seeds with the very finest layer of potting soil, then water the trays by placing them into reservoirs of water so they can soak up moisture from the bottom.
Remove the trays once you can see that the surface is damp, then continue to water whenever the potting soil dries out at the surface. Starting lettuces off in plug trays stops those pesky slugs from eating your seedlings, whilst also offering neater results at planting time.
Planting
These hardy plants will happily sit out the winter, often with little or no protection in milder climates, to give the first outdoor harvests of spring. Or plant winter lettuces undercover for a reliable supply of leaves throughout the winter.
If you have chosen to sow your lettuce seeds into plug trays, the young plants are ready to go into the ground once the roots have filled their plugs. Space them 8-12 inches or 20-30cm apart in both directions. Carefully remove the plants from their plugs then dig a hole for each lettuce plant. Firm it in, and once you’ve finished planting water settle the soil around the roots.
Plant Care
Keep your early or late-season lettuces toasty and protected by laying row covers or horticultural netting & fleece over plants to trap that valuable warmth. Don’t forget about low polythene hoop houses or tunnels - they’re another excellent way to cheat the seasons.
Water plants in dry weather to ensure robust growth and to prevent your lettuce from bolting. When growing lettuce, make sure you keep an eye out for weeds and use a sharp hoe to decapitate them as they appear or hoik out the occasional intruder by hand.
Slugs & snails aren’t a major problem when the ground is kept weed-free and watering is limited to a thorough soaking once or twice a week, but extra measures to keep a check on slugs include beer traps and the removal of shady hiding places like old pots.
How to Harvest a Lettuce
You’ve done the hard bit! The most rewarding part of growing lettuce from seed is harvesting your goods. Harvest whole heads of lettuce in one go by simply pulling up the plant from the ground. Lift them just before you need them for the best taste and the freshest leaves.
Or you can even enjoy your lettuces over a longer period by cutting just a few leaves from each plant at a time. Called cut-and-come-again harvesting, taking leaves like this not only prolongs the cropping period – so individual plants crop for anywhere up to two months – it will also give you many more leaves. Simply cut or twist the leaves from the stem, taking care not to damage it. Leave the central leaves untouched to grow on for the next cut.
Shop Lettuce Seeds at Mr Fothergill’s
What are you waiting for? Your growing journey starts right here at Mr Fothergill’s! Shop our lettuce seeds today and let us help get your lettuce garden going.
If you have any further questions about how to grow lettuce or have curiosities about any of our other products, don’t hesitate to contact us or take a deeper dive into our gardening blog!