




How to Grow Your Own Roast Dinner
The Best Vegetables to Grow for a Sunday Roast


Potatoes


Carrots


Parsnips


Swede

Brussel Sprouts and Cabbage


Onions

Adding Flavour


Grow your dinner and #GrowYourself
Related Articles
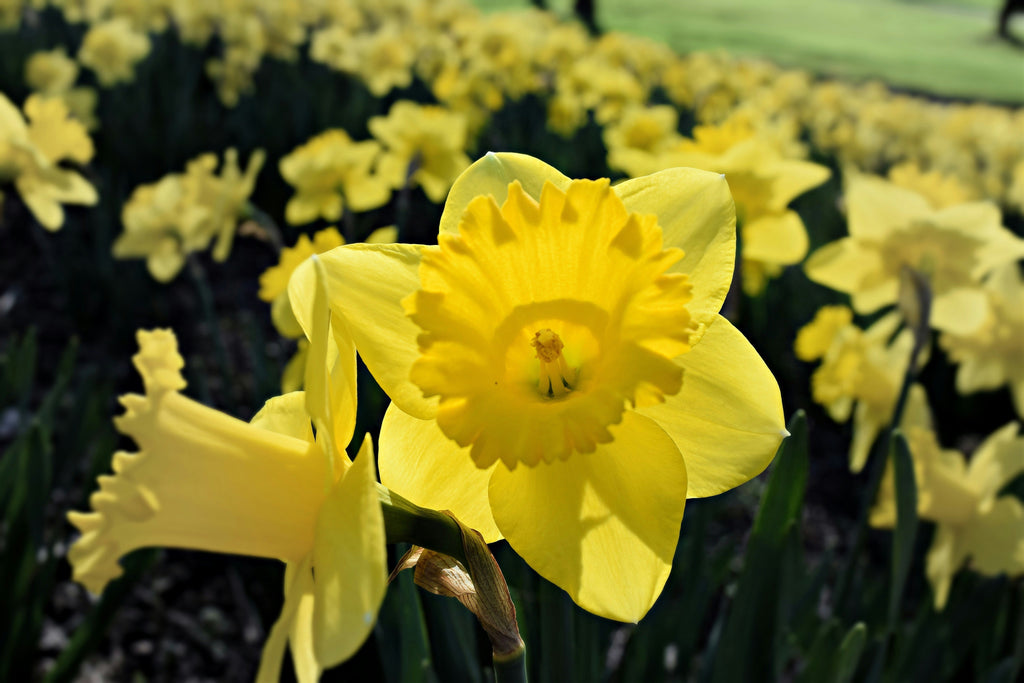

Spring flowering bulbs like daffodils, tulips, and crocuses are some of the most cherished sights in the garden, creating the perfect welcome to spring and marking the return of warmth and colour. But once their vibrant blooms fade, many are left wondering what to do with bulbs after flowering to ensure they return year after year.
Proper care after flowering can help your bulbs thrive so they come back with a stunning show of flowers the following season. Here’s everything you need to know about caring for your spring bulbs after flowering so you can keep your garden beautiful year-round.
Why It’s Important to Care for Your Bulbs After Flowering
Taking care of your spring bulbs after flowering is key to ensuring their longevity and future blooms. After flowering, bulbs will need time to recharge and store energy for the following season’s round of growth. By following the right practices, you can enhance your bulbs' health for a spectacular bloom next spring. Not only will this help you to maintain a healthy and gorgeous garden, but it’ll also save you the cost of replacing bulbs every year.
What to Do with Bulbs After Flowering
Once your spring bulbs have finished flowering, it’s time to think about how to care for them. Follow these simple steps to ensure your bulbs remain strong and healthy for next season.
Let the foliage die back naturally
After the flowers have faded, it’s essential to let the foliage die back naturally. Their leaves should be left in place, ideally for around 6 weeks after flowering, so they can carry on feeding the bulbs and recharge the energy store for next year.
Don’t be tempted to smarten up the leaves by tying them up in bunches, as this will severely decrease their ability to photosynthesise and feed the bulbs.
Cutting back and deadheading
Deadheading, or removing the faded flowers, is important for a tidy garden and to prevent the plant from wasting energy on seed production. Snip off the flower heads as they fade, but avoid cutting the leaves. Only trim the foliage once it has fully yellowed.
When to stop watering
As your spring bulbs enter their dormant phase after flowering, you can reduce watering. Once the leaves begin to yellow, it’s time to ease up on watering. Bulbs no longer need as much moisture at this stage, and overwatering can lead to rot. Keep the soil lightly moist, but allow it to dry out gradually to let the bulbs enter their resting phase.
[[ products ]]
Should You Lift Spring Bulbs After Flowering?
While it may be tempting to clear away the bulb beds after the flowers have passed, it's crucial to consider whether or not to lift your bulbs. It’ll depend on the type of bulb you want to lift and the climate you’re in:
- Tulips will benefit from being lifted and given a dry dormant period in summer for the bulbs to ripen and rest. Lift them carefully, dry them out, and store them in a cool, dry place until autumn to avoid rot.
- Daffodils prefer to be left alone, and moving them needs to be done with care; otherwise, they may miss a year’s flowering until they have established themselves well again. An alternative to lifting them is to grow them in large containers that can be planted over or moved out of the way once the displays are over.
The best advice for lifting any spring bulbs is to lift late and replant early.
How to Lift and Store Spring Bulbs
Any bulb can be lifted carefully to minimise damage to the roots and the leaves, then replanted into pots of compost and placed out of the way in a partially shaded spot to grow on. Initially, planting them in a bulb planting basket makes the process of lifting them quick and easy.
- Lift the bulbs carefully using a spade or garden fork, taking care not to damage the roots.
- Separate the bulbs if clumps are overcrowded or congested. This gives them more space to grow and thrive.
- Clean off any excess soil and allow the bulbs to dry out in a cool, dry place for several weeks.
- Store the bulbs in a well-ventilated area, such as a paper bag or box. Check them periodically to ensure they’re not rotting.
Replanting Spring Bulbs
Once the leaves have yellowed, the bulbs can be left to dry out and go dormant to give them a rest. Giving bulbs a dry dormant period in summer will protect them from rot and help ripen the bulbs for next year.
Afterwards, they can be planted in the autumn to flower again next spring. A good indicator of when to plant out bulbs is when the soil temperature has cooled to at least 13°C; that’s usually when night temperatures are regularly getting down to around 5°C. This will encourage bulbs to make strong roots rather than wasting energy producing top growth. Using a purpose-made bulb planter will make the process quick and easy. Long-handled bulb planters are great if you have a bad back or have a large area to plant.
Be sure to keep the compost moist, as overwatering may cause the bulbs to rot. If in doubt, keep the compost on the dry side rather than wet. Plants can be given a boost at this stage with a top dressing of flower bulb fertiliser or sulphate of potash. Don’t be tempted to put fertiliser in the planting hole, as this may cause root burn and damage the bulbs.
Turn Your Spring Bulbs to Blossoming Blooms with Fothergill’s
Caring for your spring bulbs after flowering ensures they’ll return strong and ready to bloom the following season. By following the proper post-bloom care techniques—such as allowing the foliage to die back, deadheading, reducing watering, and lifting or replanting as needed—you can enjoy a stunning spring garden year after year.
Ready to plant fresh bulbs for next season’s show? Explore Fothergill’s range of spring flowering bulbs for all your gardening needs. With a variety of anemones, lilies, and crocuses, we have everything you need to create a beautiful garden that thrives.

As beautiful as they are, these flower plants are also known for their likelihood of drooping - making your floral arrangement appear limp and lacklustre. But worry not! You can still enjoy decorating your living room, dining room or kitchen with tulips from your cut flower garden without them slouching like a fed-up teenager.
So, let’s get to it. Without further ado, here is how to stop tulips drooping in your vase!
Why Are My Tulips Droopy?
If your tulips look like they’re in a bad mood, it’s probably because they are! We’ve all experienced the dreaded feeling of being ‘hangry,’ and so have your tulips. So, if you’ve come home to find your once full-of-life tulips drooping, the chances are that they’re dehydrated!
So, the quickest way to maintain the health of your tulips is to make sure that they’re well-fed and in view of sunlight! But what are some other tips and tricks for how to stop tulips drooping?
Keep Them Watered
Tulips are a relatively low-maintenance plant, but that’s no excuse to neglect them! They may be independent, but you’ll find that your tulips really appreciate fresh, cold water. Fresh water works to reduce any bacterial growth, whilst cold water keeps the stems nice and firm.
Cut Stems at an Angle
In order to maximise the amount of water getting to your tulips, cut your stems at an angle to increase the surface area of absorption in the stems. If you notice that your tulips begin to droop again, don’t be afraid to give them a little trim, taking off around an inch and maintaining that 45-degree angle in the stem.
Make Them at Home in their Vase
Choosing the right vase is important! In order to keep your tulips nice and firm, home them in a straight-sided vase to maintain their shape. Like all flowers, tulips require sunlight to stay healthy. You might have noticed your plants in the past reaching for sunny areas of the garden or windowsill! Be sure to rotate your vase regularly, ensuring that all sides of the plant have access to the sun. This way, your tulip plants should maintain their original shape and continue to reach upwards.
The Newspaper Method
Read all about it, read all about it! One of our favourite tips for how to stop tulips drooping is hot off the press. Before putting your tulips into a vase, we recommend wrapping them in newspaper and allowing them to sit in water for a few hours. The paper helps to enforce a shape over your tulips, holding them upright as they hydrate themselves in the vase.
The Pin Method
I like to think of this method as the face-lift of the drooping tulip. If your tulips begin to droop, a nifty tip is to put a pin through the tulip’s stem and into the head of the plant to quite literally prop your flowers up. This, combined with regular maintenance, can give your flowers an undeniably vibrant and lively look.
Shop Tulips at Mr Fothergill’s
What are you waiting for? Your growing journey starts right here at Mr Fothergill’s! Shop our fantastic range of tulip flower bulbs and tubers today, and let us help you bring the outdoors indoors!
If you have any further questions about how to stop tulips drooping or have any curiosities about any of our other products, don’t hesitate to contact us or take a deeper dive into our gardening blog!

